My day job as a software engineer predictably involves very little movement - typing is hardly the greatest exercise. And I hardly do much of that these days, it’s all (virtual) meetings, meetings, meetings. There’s also little produced that’s tangible. Oh there’s value don’t get me wrong. But nothing you can hold.
I find woodworking an excellent counterpoint to this. Ok, there’s still not exactly much in the way of exercise (I use a mix of hand tools and machinery but major on the machinery … a topic for an entirely separate post!). But there is tangible product. It’s not necessarily good but it does provide me some entertainment. And the output is occasionally useful.
I’ve been turning wood into firewood long enough now that I’ve even had people ask if I’d make them something. Not many you understand, but enough that I’ve had to turn some down (hey, I’ve got my own projects I’d like to do ![]() - like turning literal firewood, or old Christmas trees, into Christmas ornaments). My sister-in-law’s other half even asked if I fancied doing it professionally. Whilst stunned he could think I’m good enough for that (I’m not) it did make me think … but not for long. This is something I do for fun and I think being paid for it would remove some of the joy.
- like turning literal firewood, or old Christmas trees, into Christmas ornaments). My sister-in-law’s other half even asked if I fancied doing it professionally. Whilst stunned he could think I’m good enough for that (I’m not) it did make me think … but not for long. This is something I do for fun and I think being paid for it would remove some of the joy.
It would also remove some of the flexibility. The requests I do take on are necessarily flexible. Read on for why.
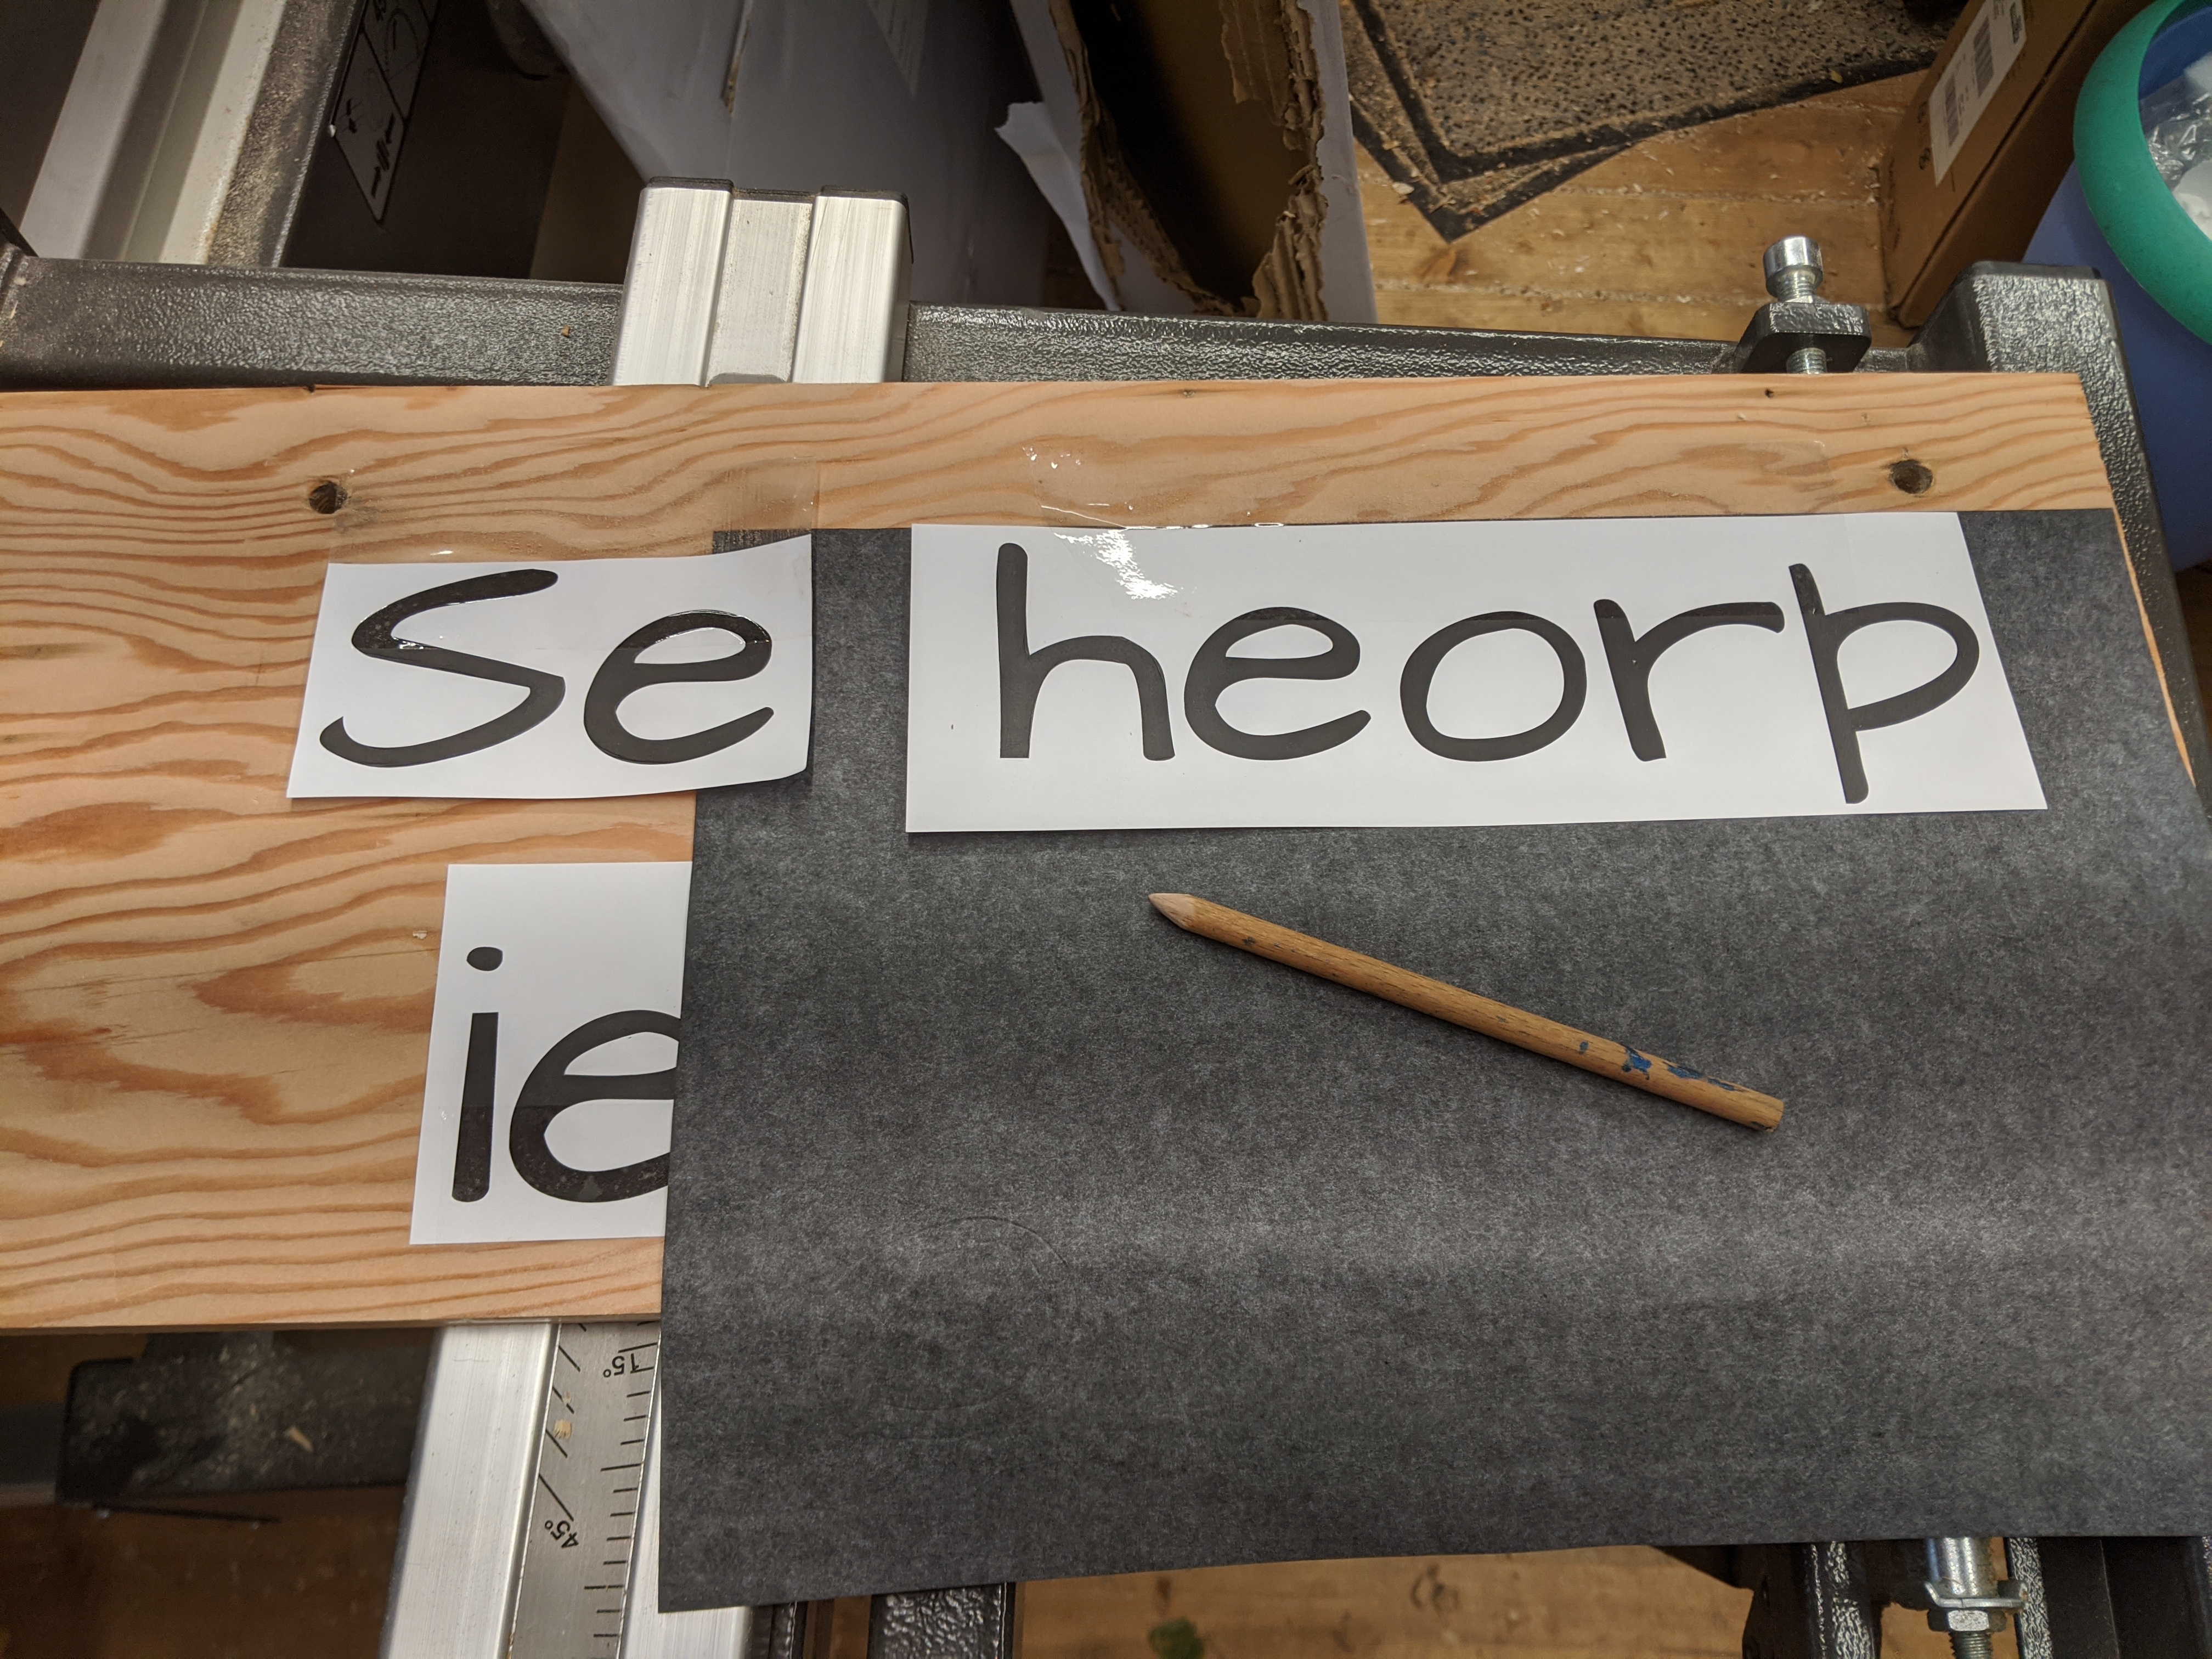
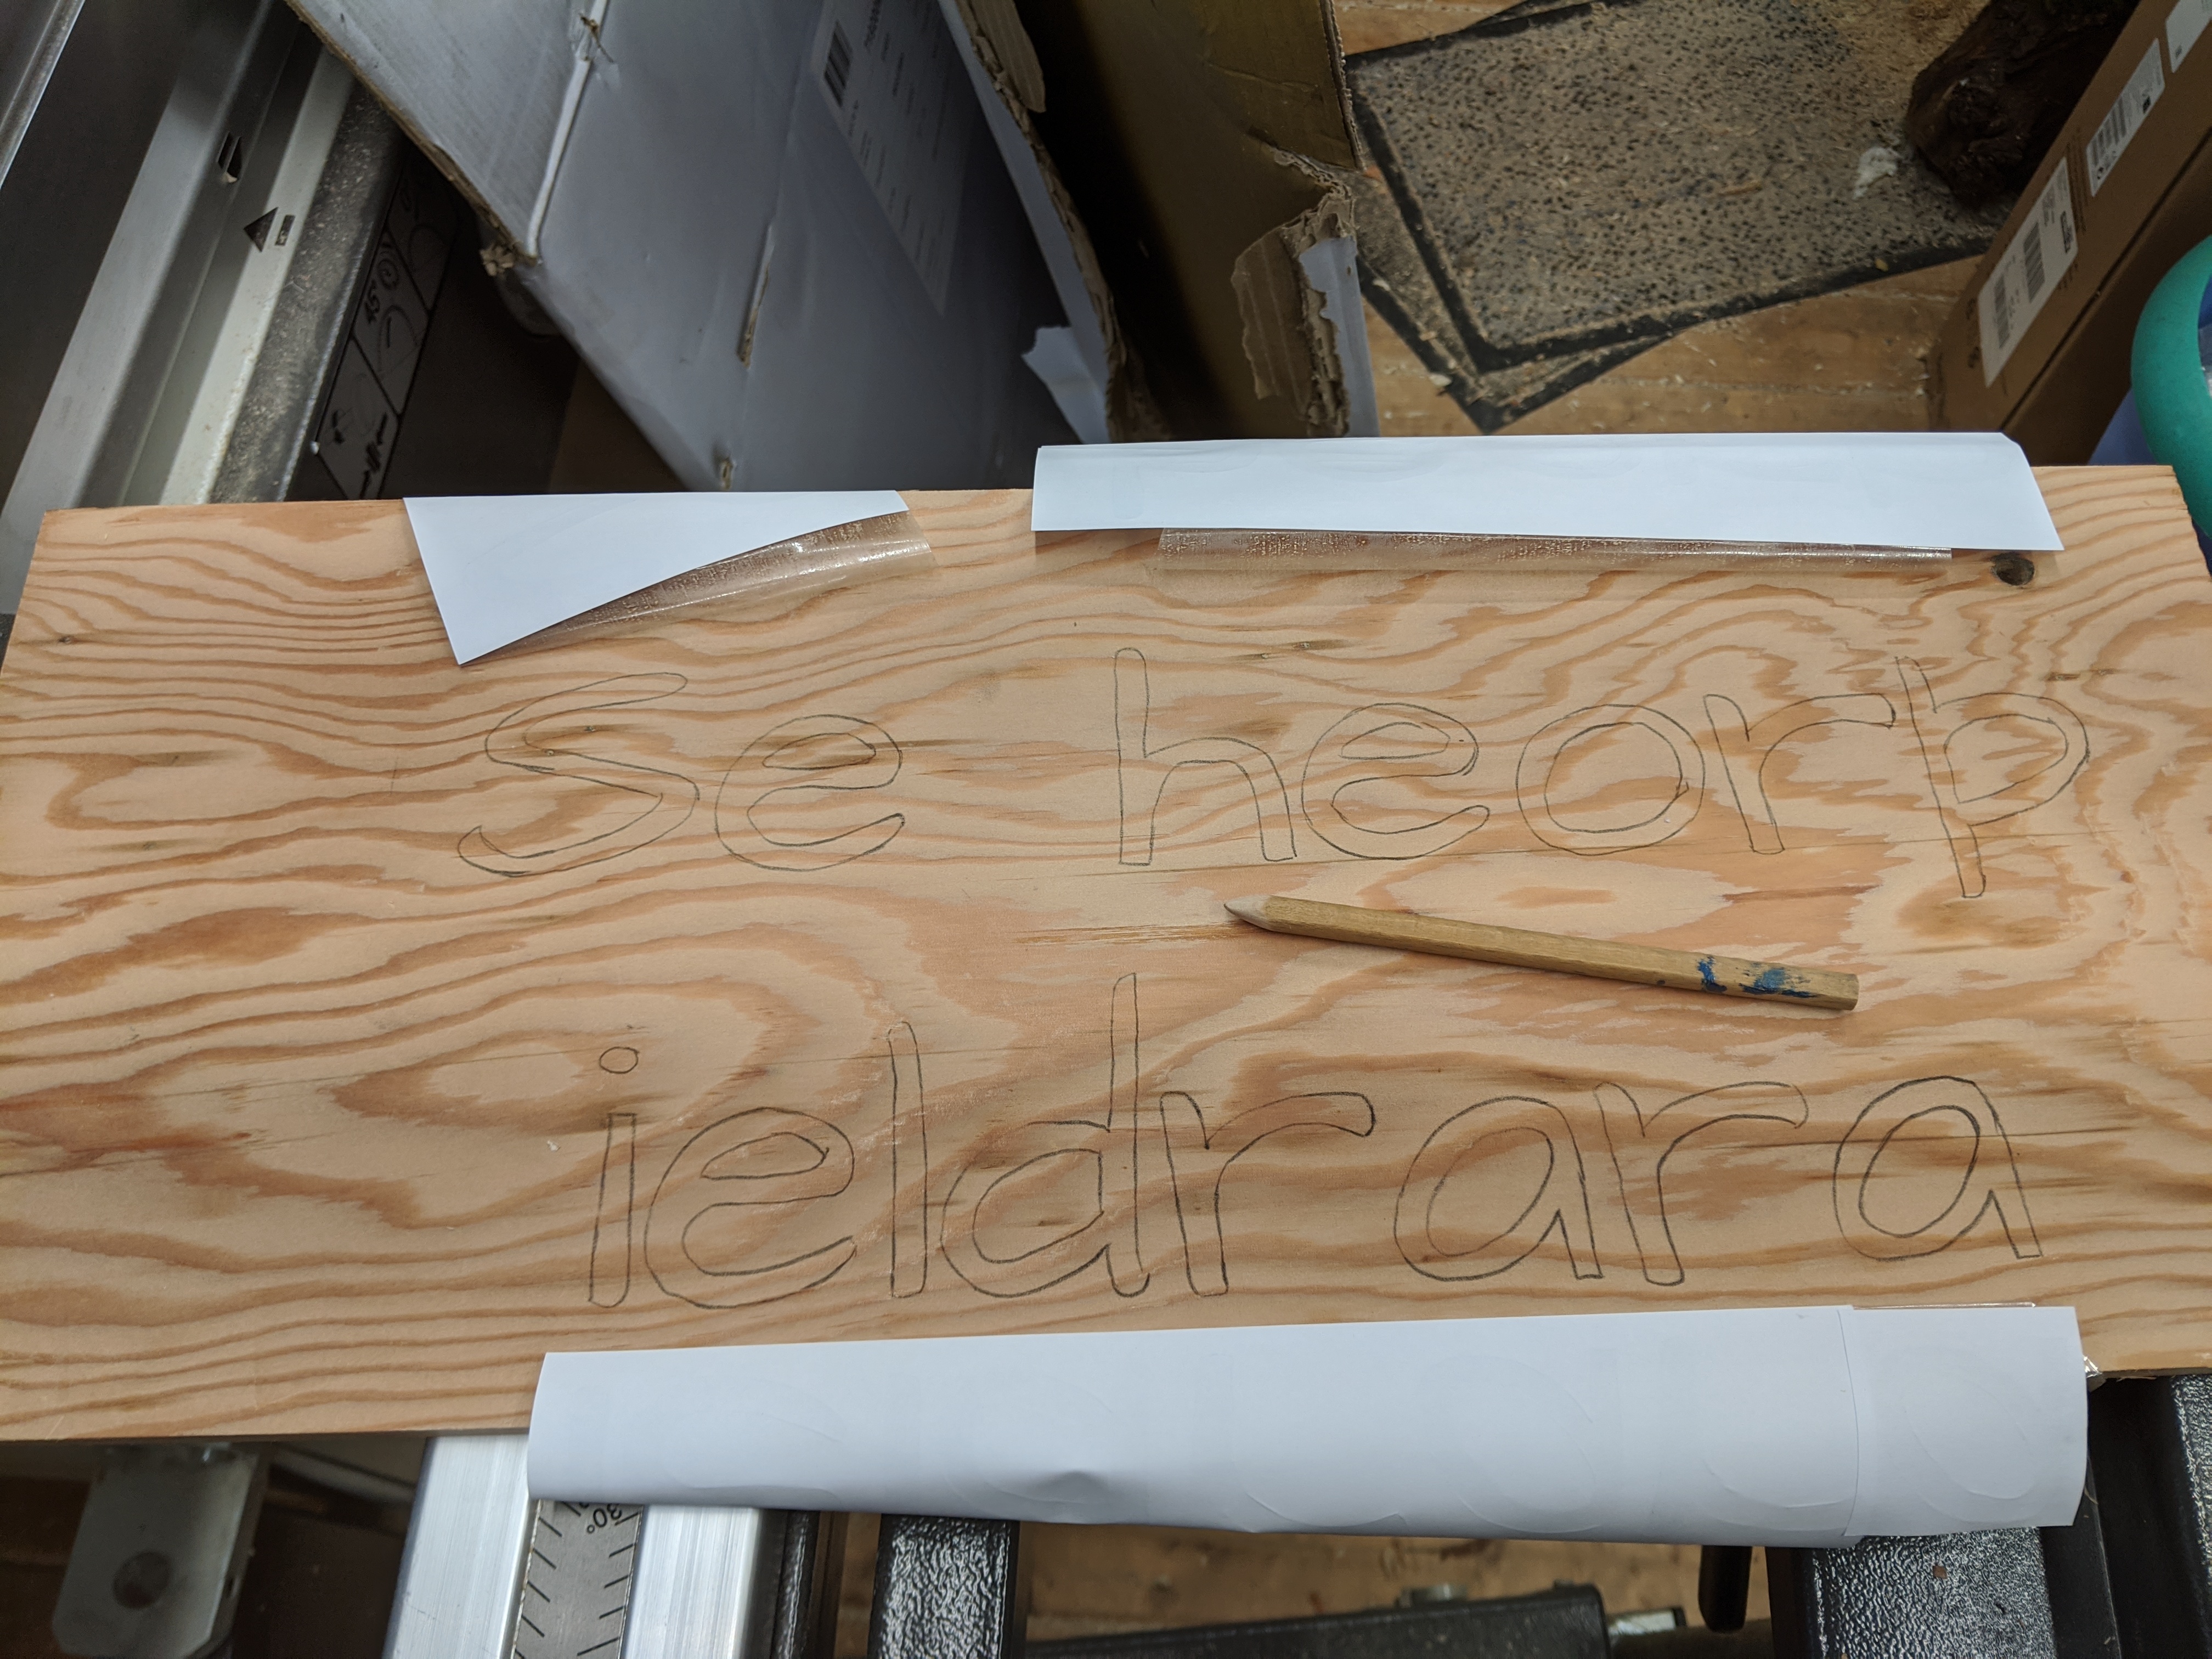
My father-in-law asked if I’d make a house sign as a Christmas present for for mother-in-law. But he couldn’t decide whether he wanted Dunmovin or Se heorÞ ieldrara (yes, that’s a thorn not a p). The former is a play on Dunroamin, the latter Old English which roughly translates to The Home of Elders.
Hardly a project I could turn down and an excellent excuse for trying a couple of new techniques … and buying a new tool. I decided a double-sided sign would be just the ticket. So far I’ve managed to avoid buying much in the way of wood - I seem to have enough scrap around for this sort of thing. For this particular project I grabbed a slab of what I think is pitch pine - it was one of the treads we replaced from the stairs in our house almost a decade ago.
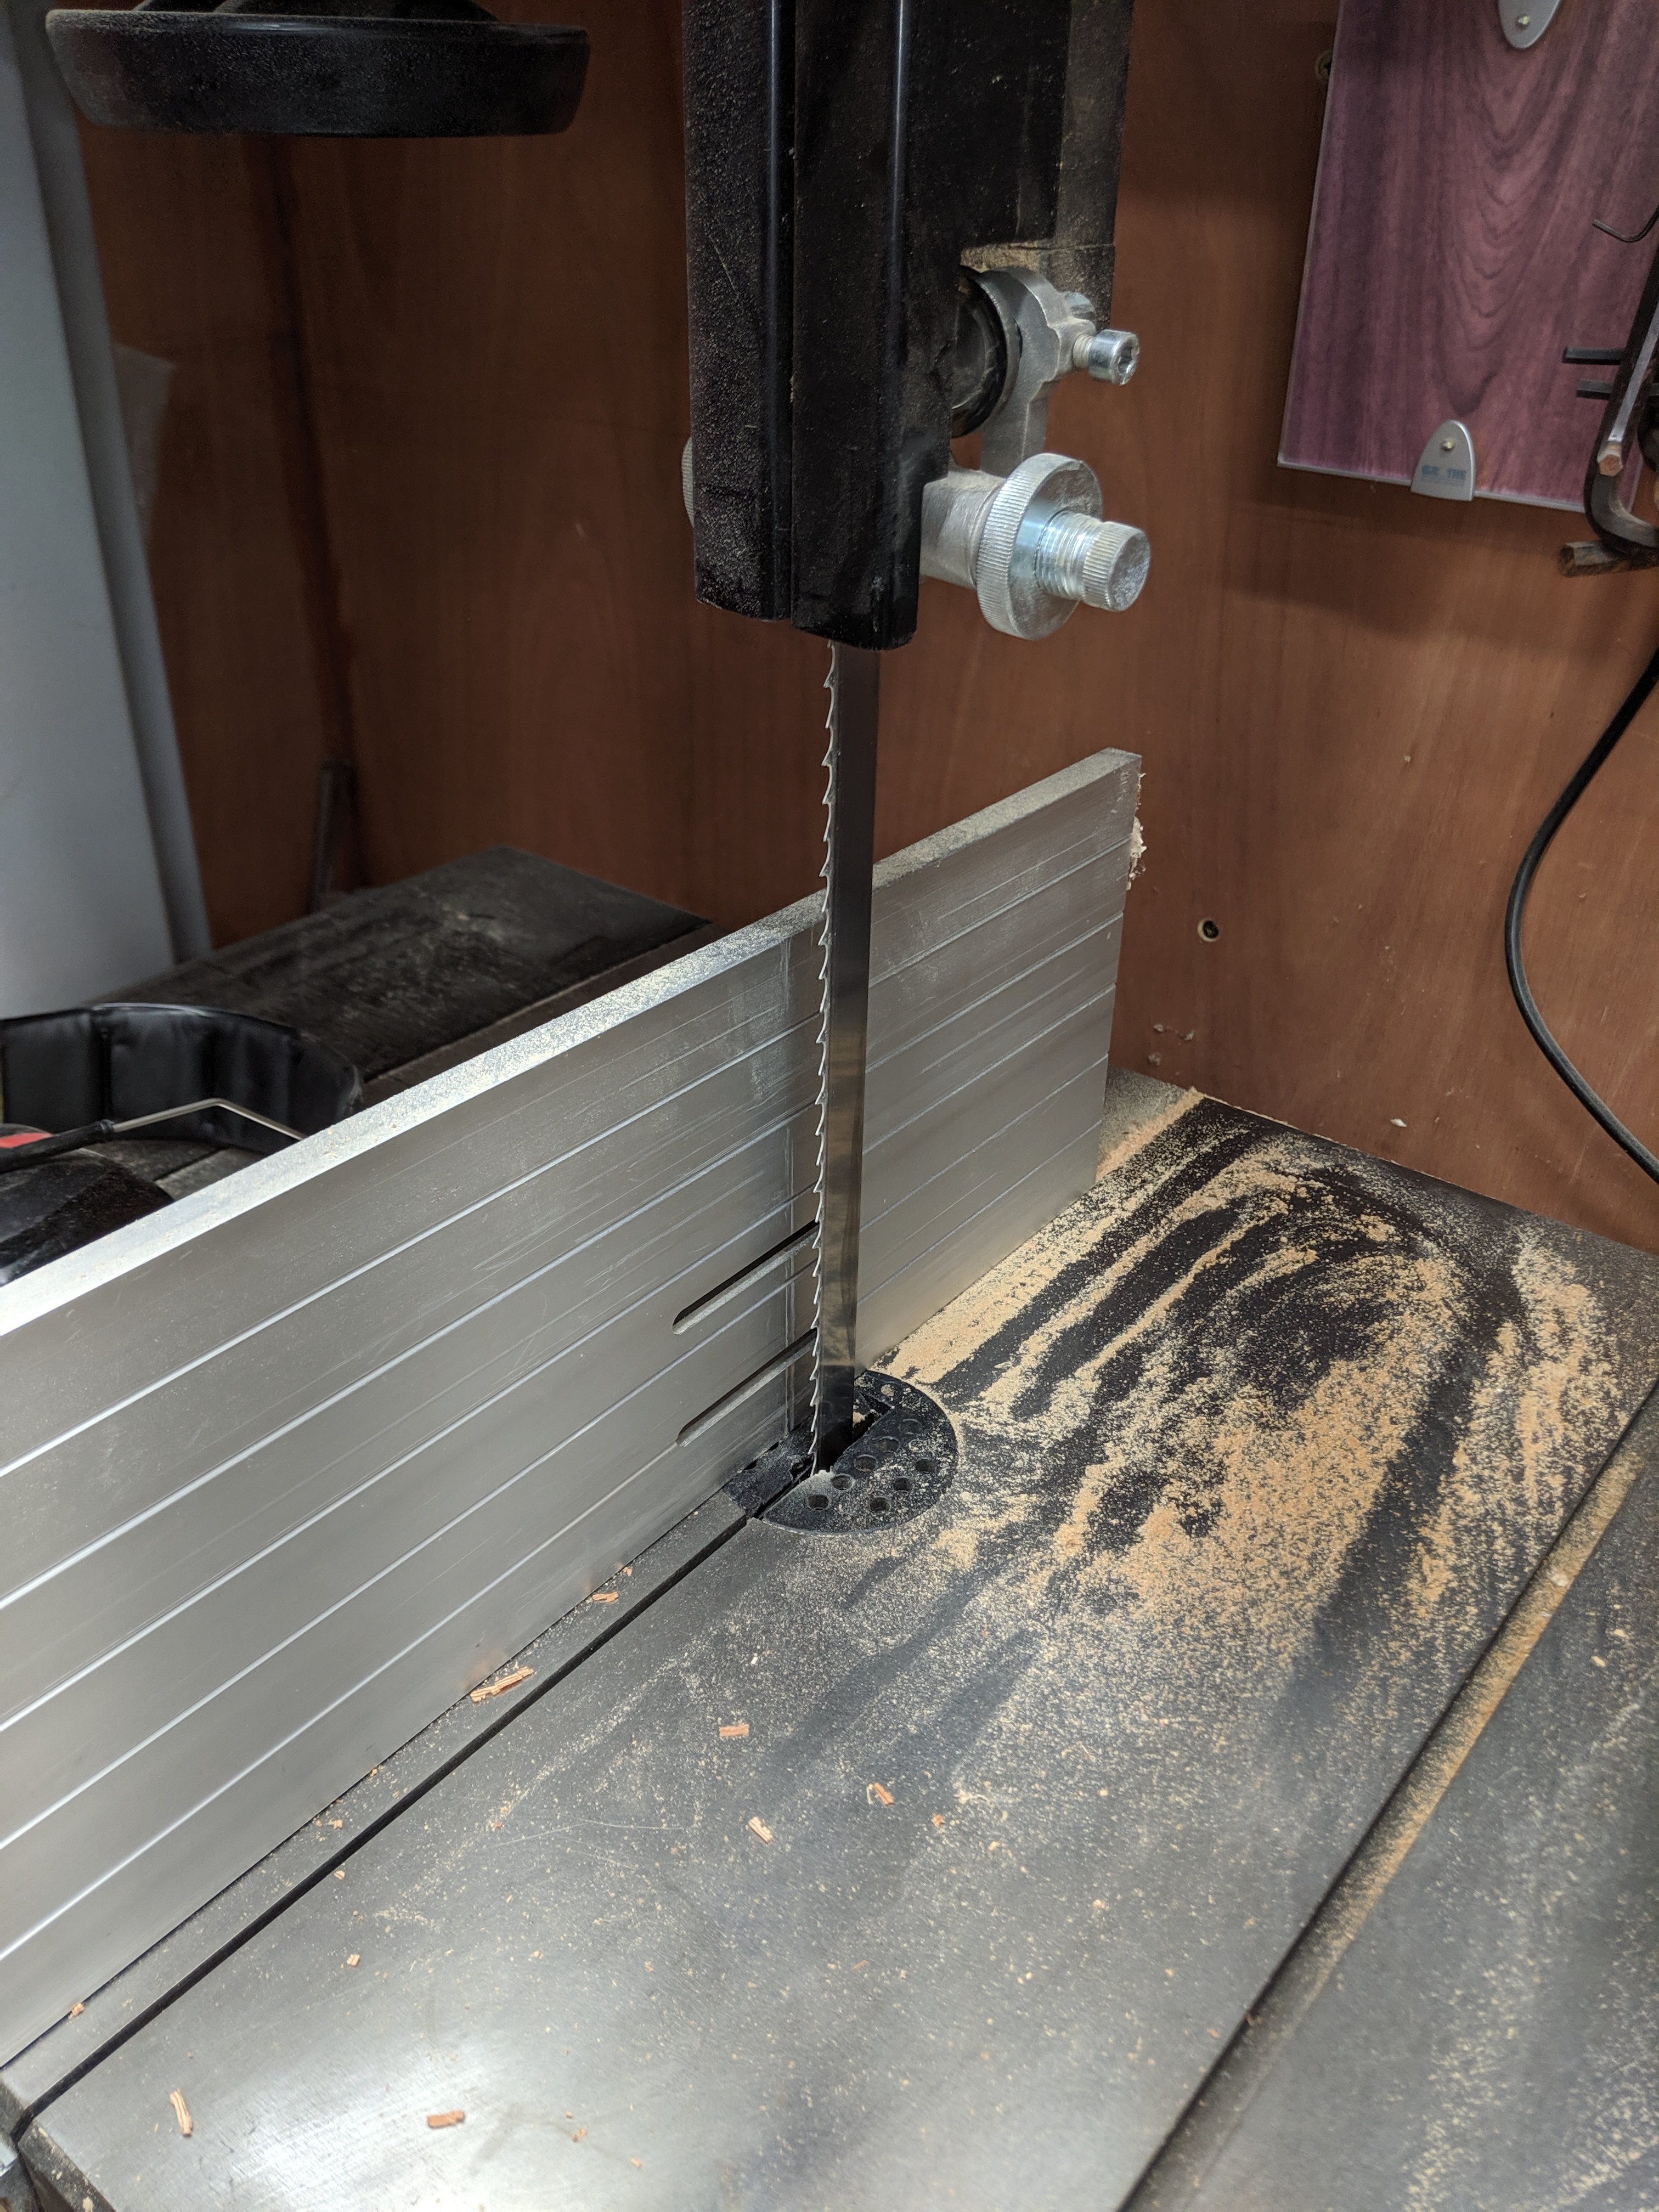
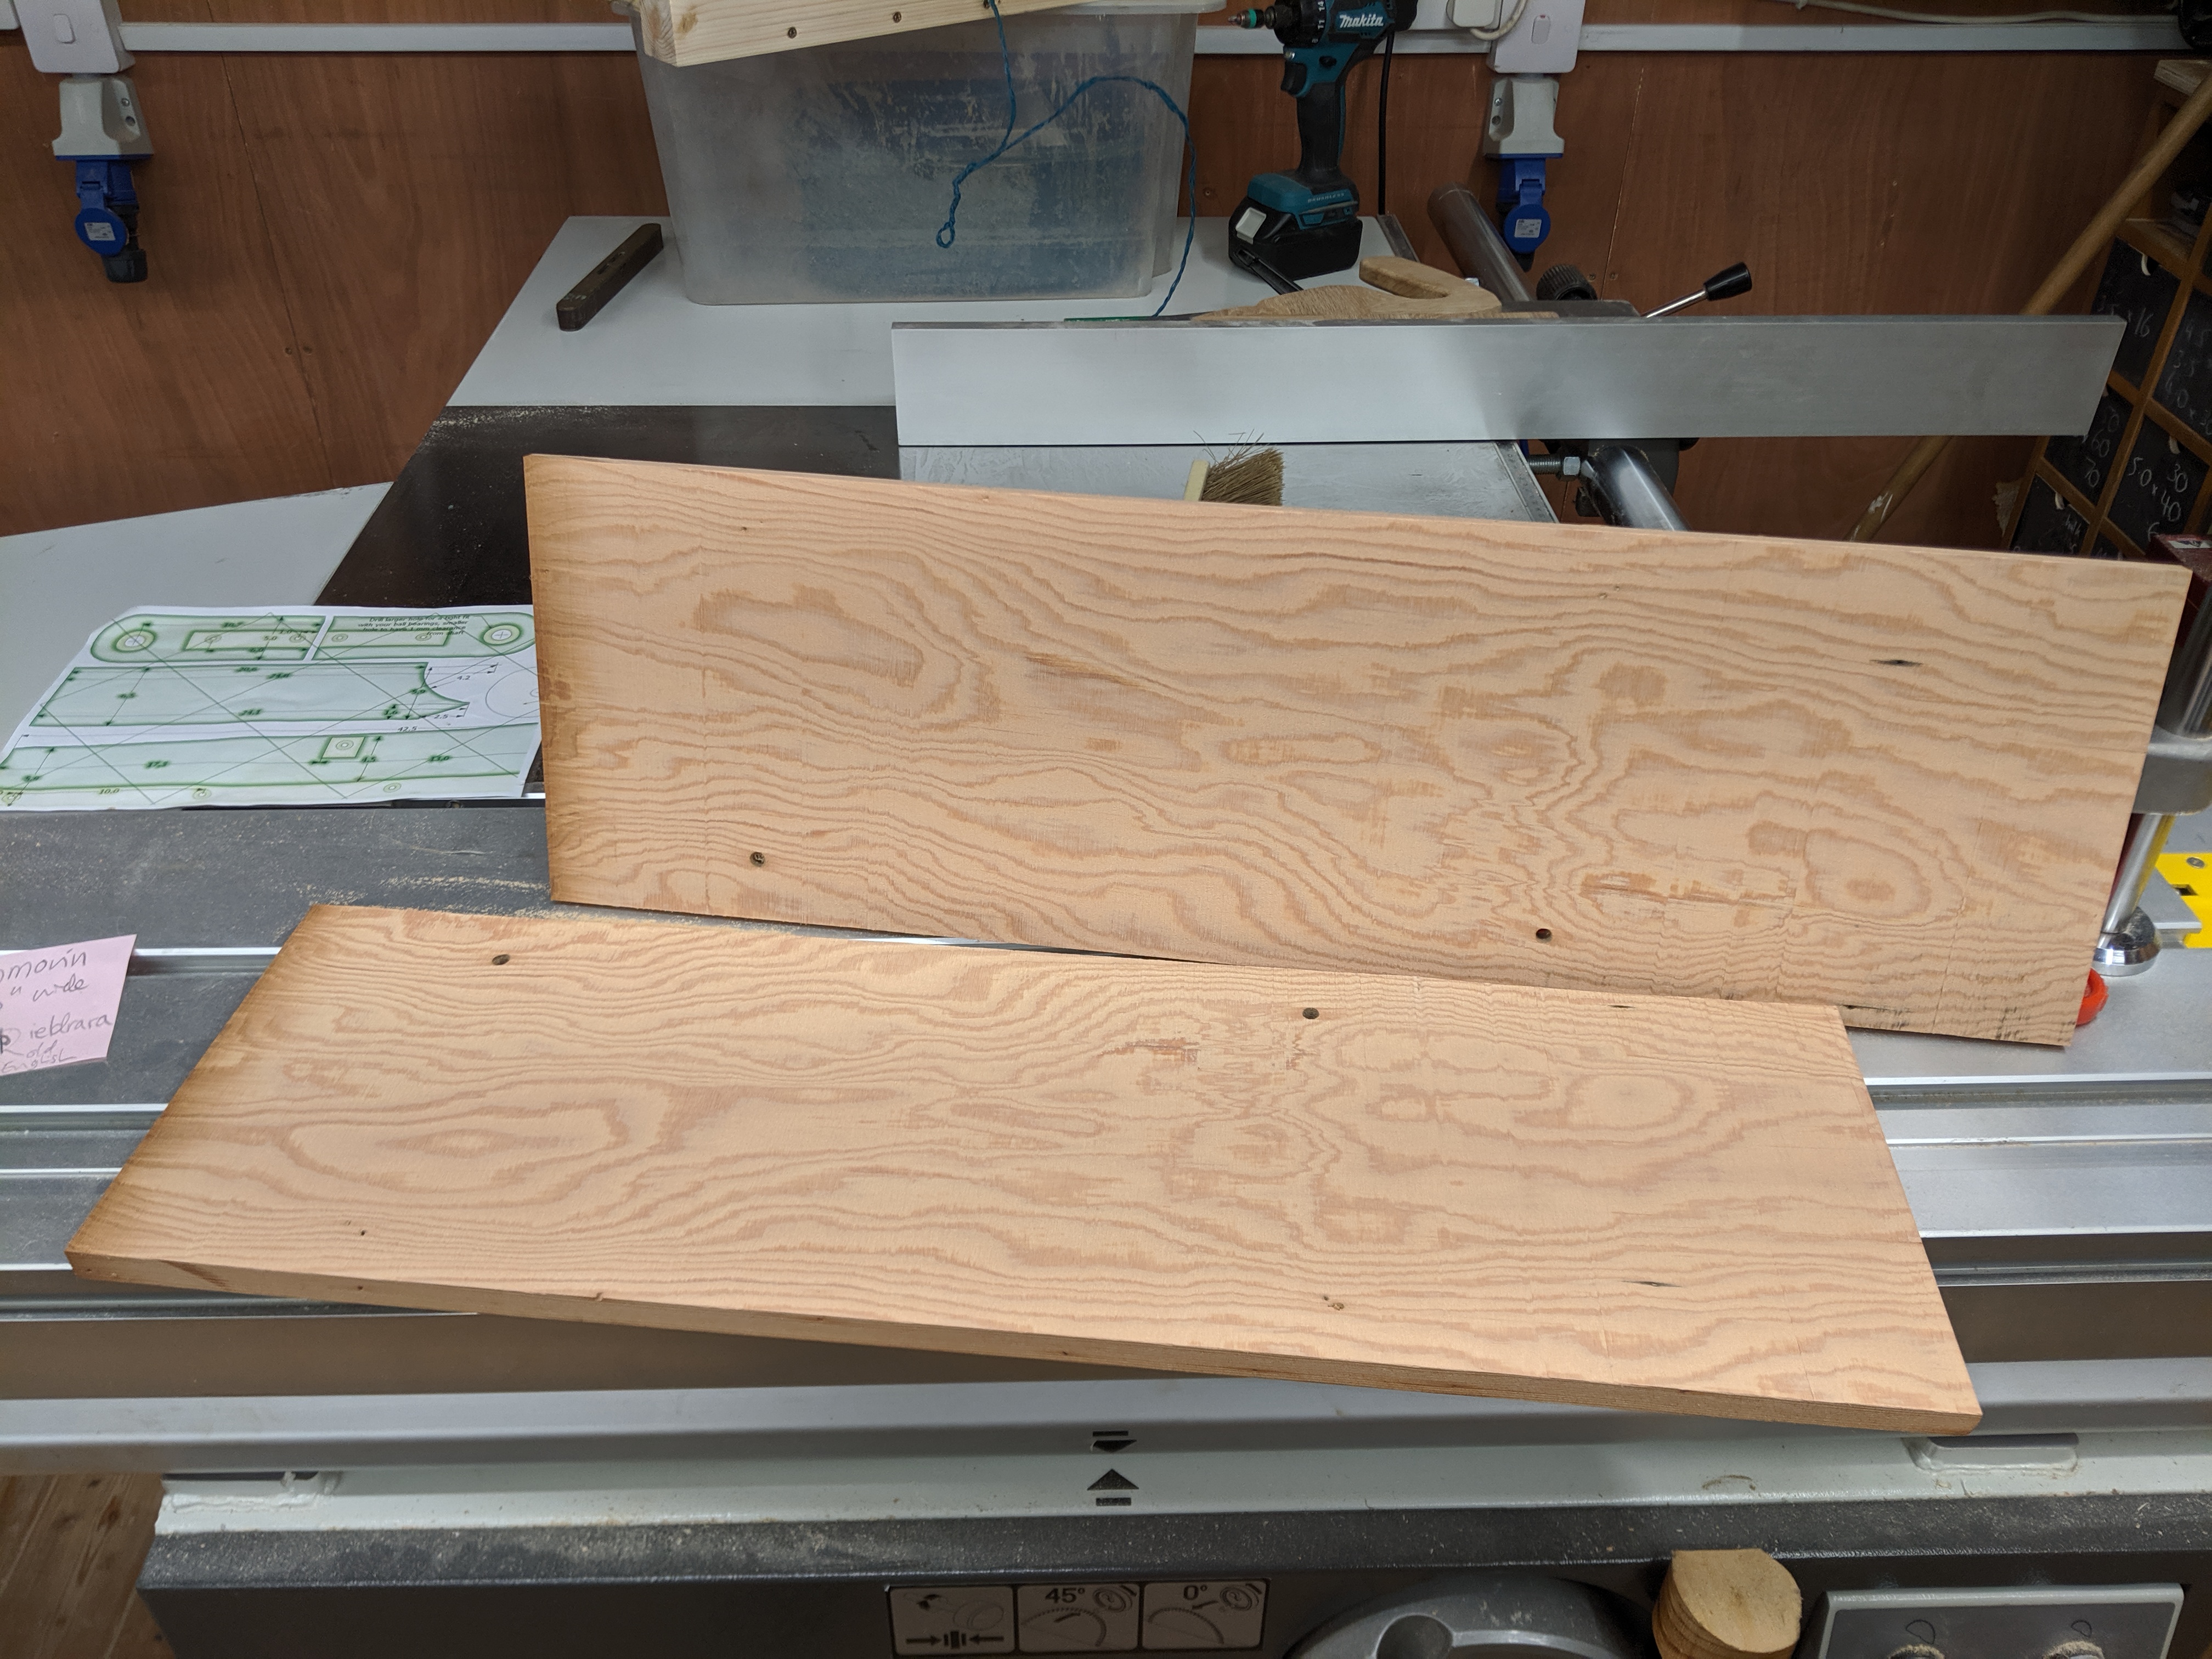
I planed (yep, hand tool) the finish off both sides of the stair tread then resawed (machine: bandsaw) into two halves that I’ll later glue back together. Resawing is not something I’d managed successfully up to this point so I made sure to put an appropriate blade on the bandsaw and took my time. For once drift wasn’t a problem and the result was better than I could’ve hoped.
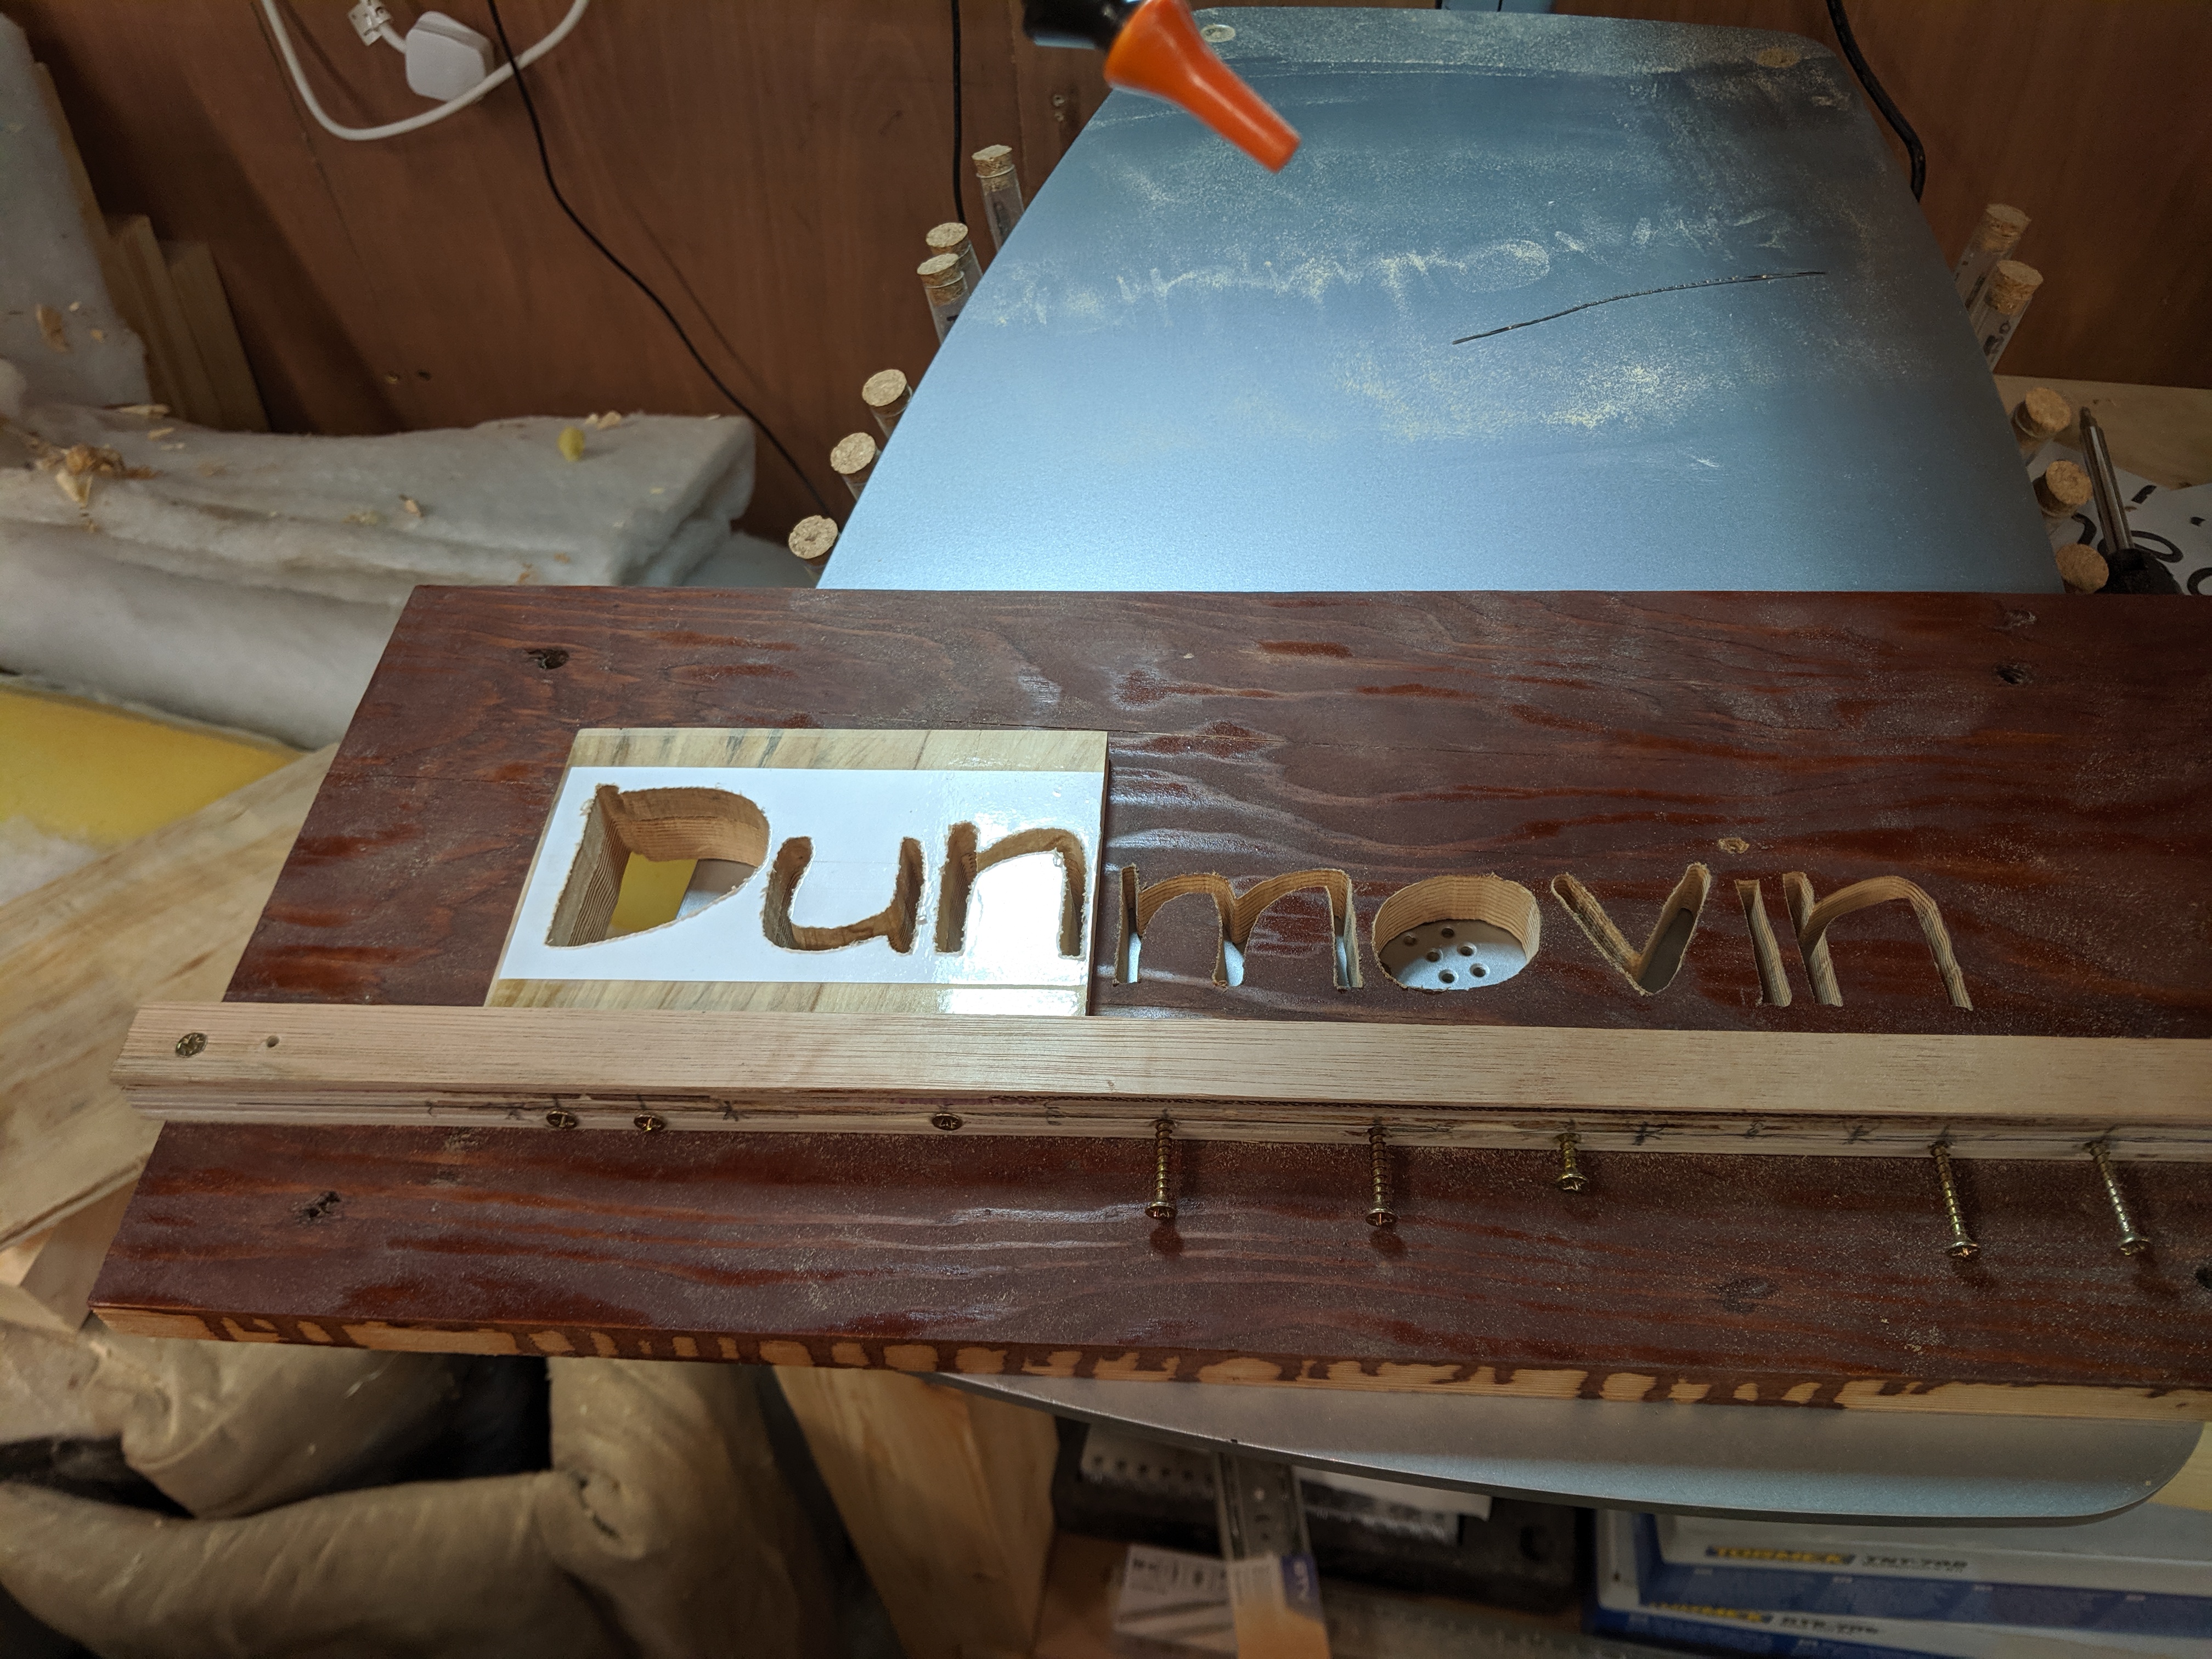
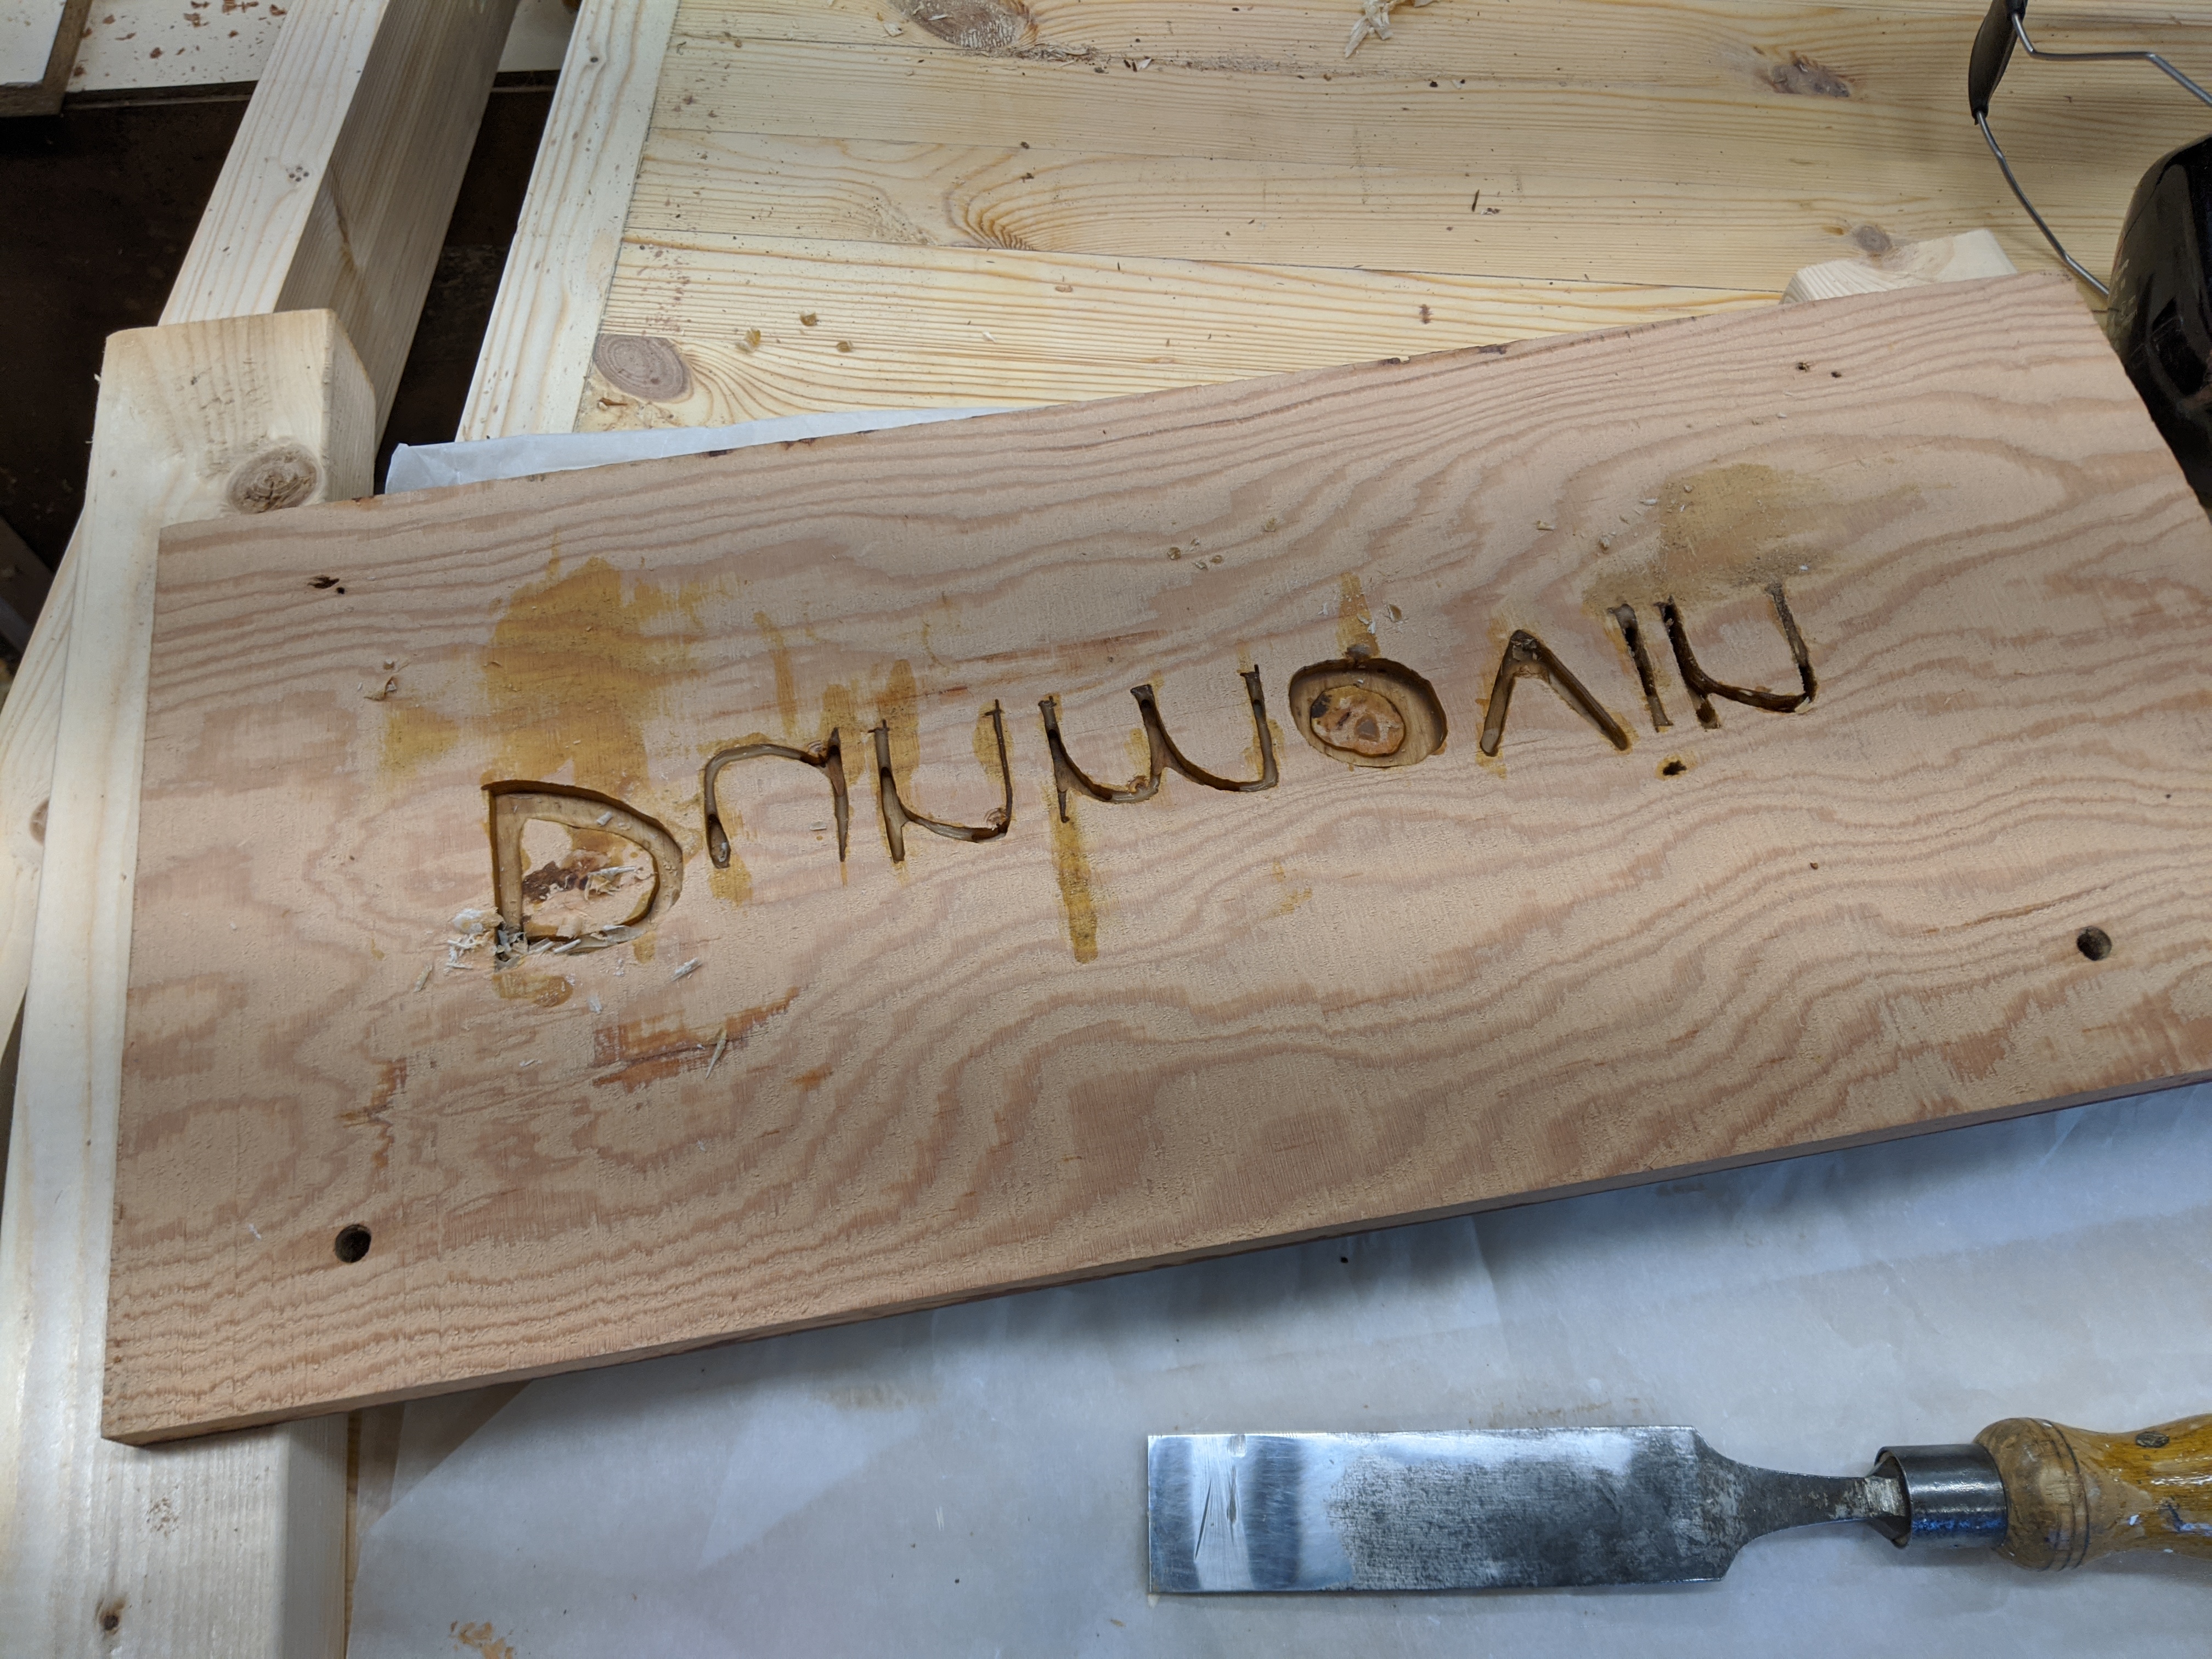
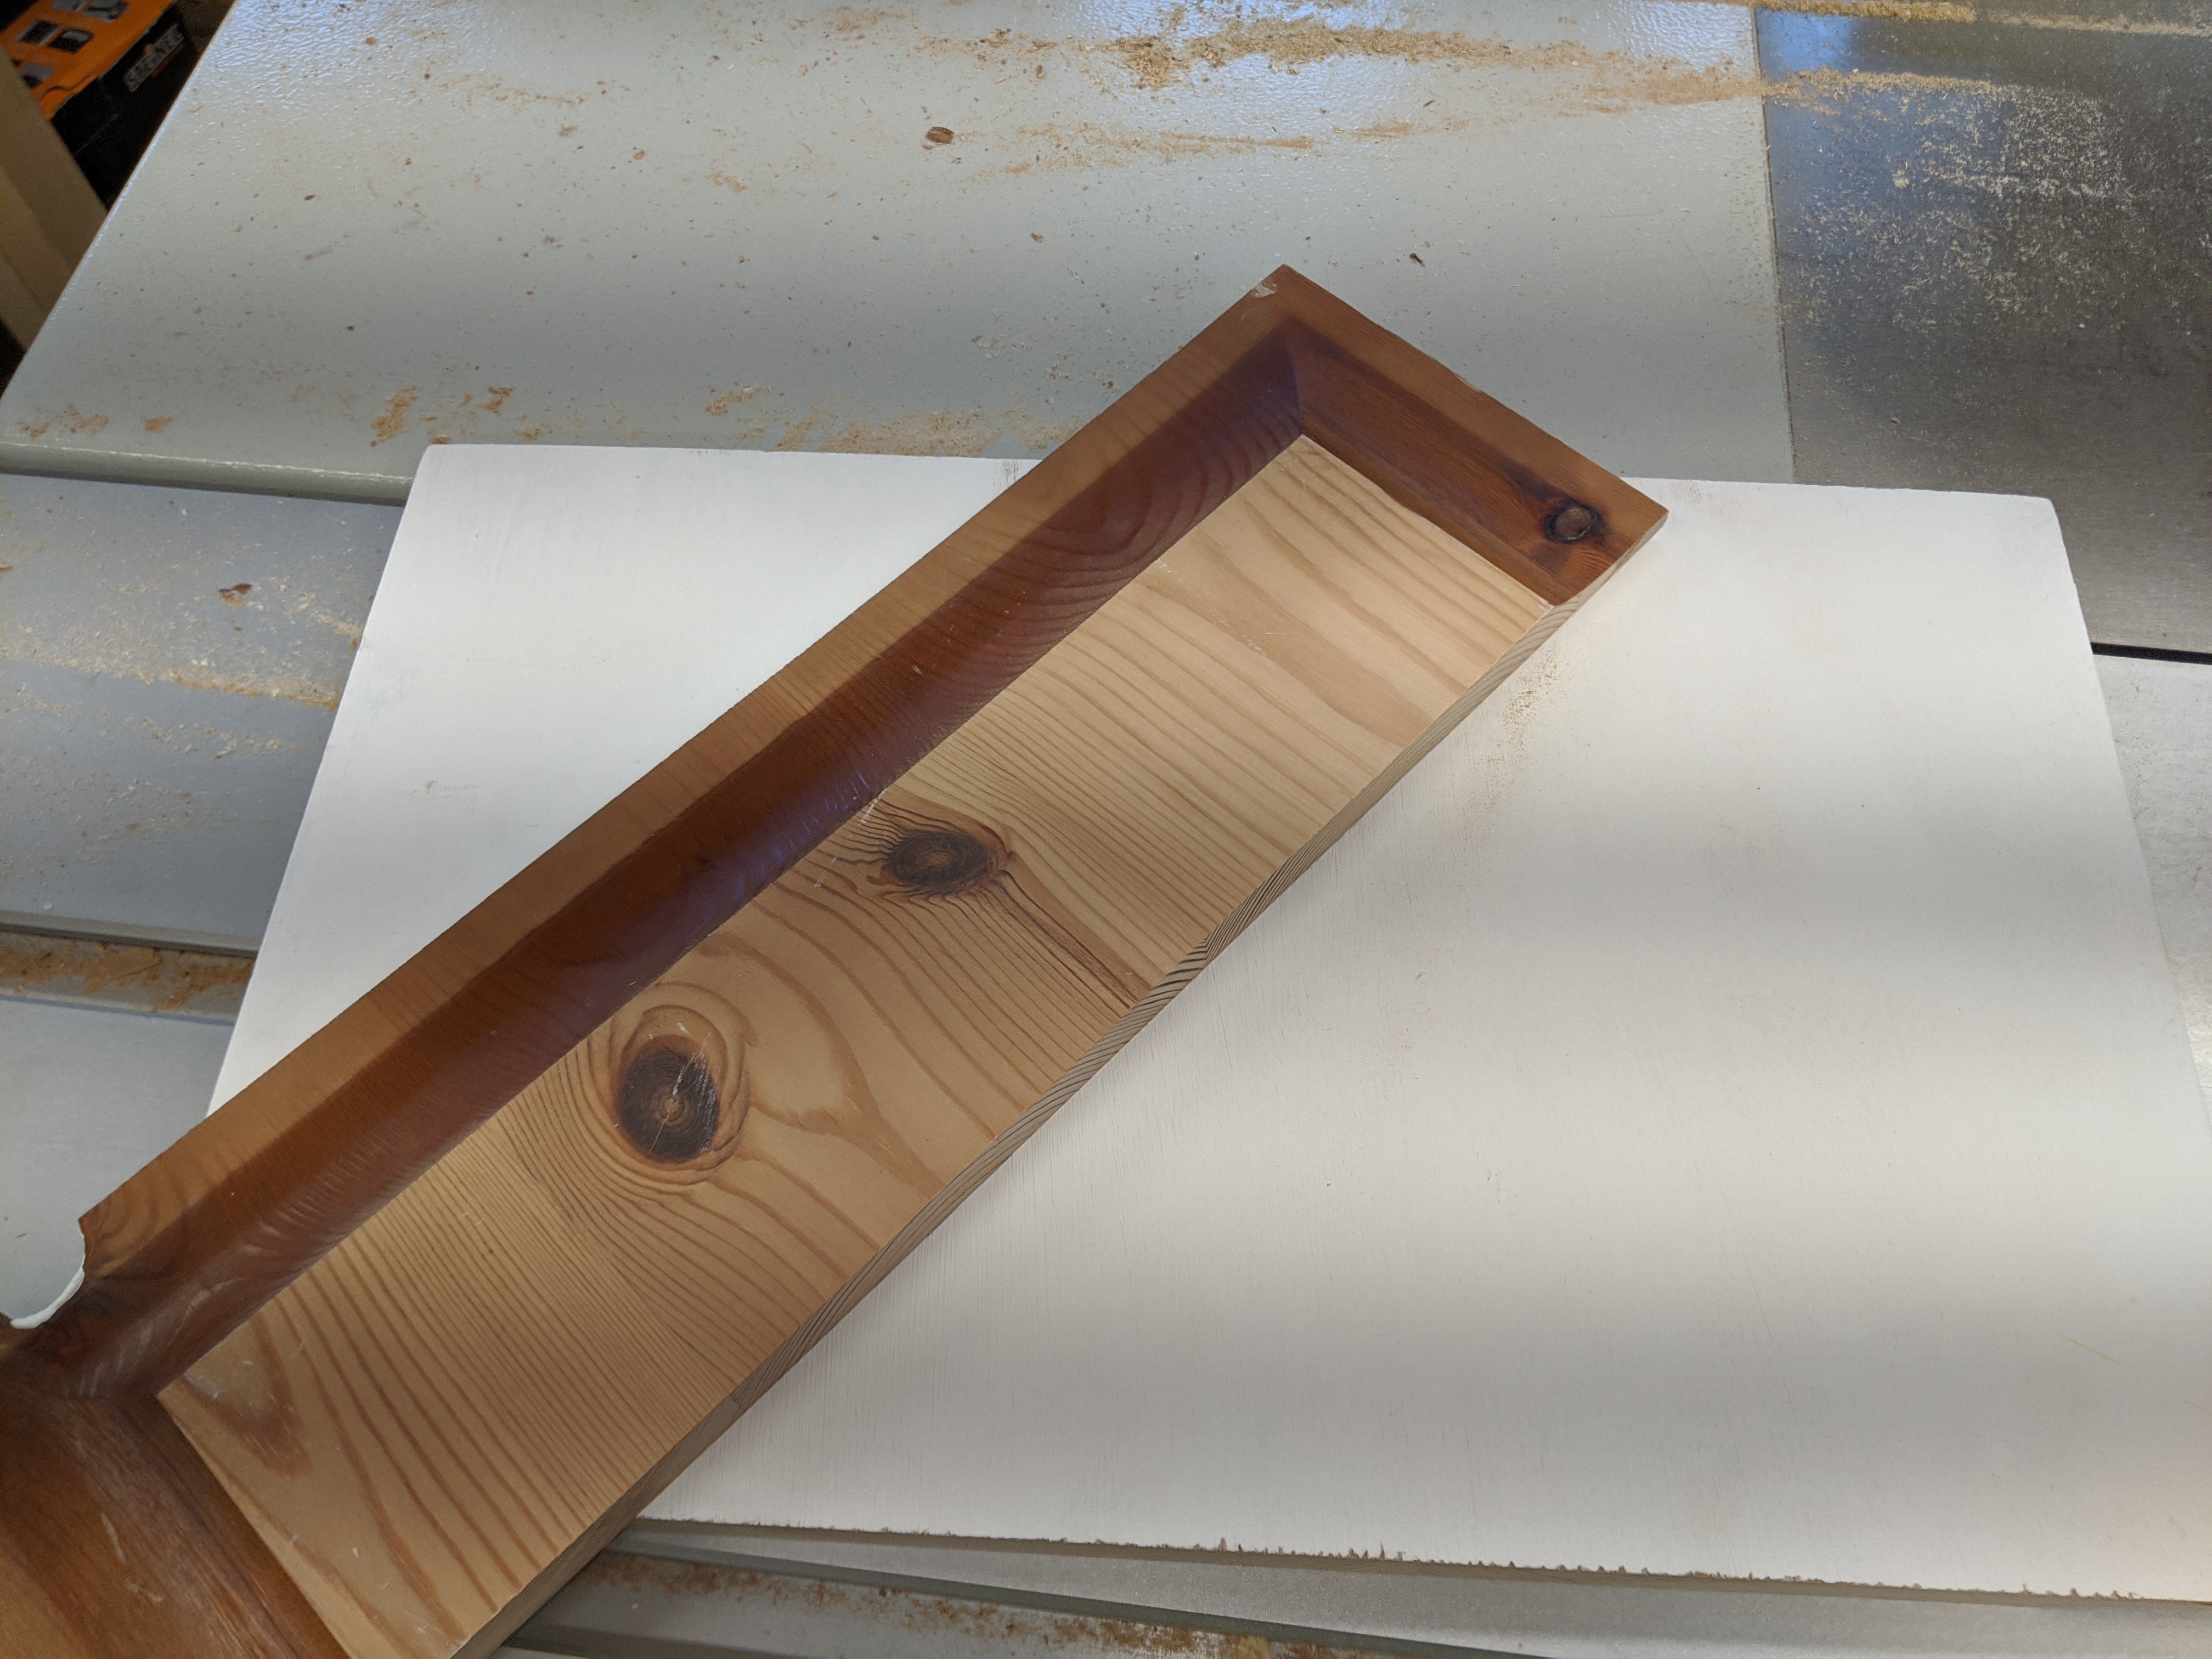
I then used my scrollsaw (yep, machine) to cut out inlay and holes for that inlay. I used this opportunity to inlay wood for the first time ever. YouTube is an incredible resource for learning new techniques but I’m not only short of time but also impatient so tend to just crack on with things. I did do a test cut which went well and although I used the same 3-4 degrees of offset, not all letters came out as perfectly as I’d like. But they’re certainly good enough.
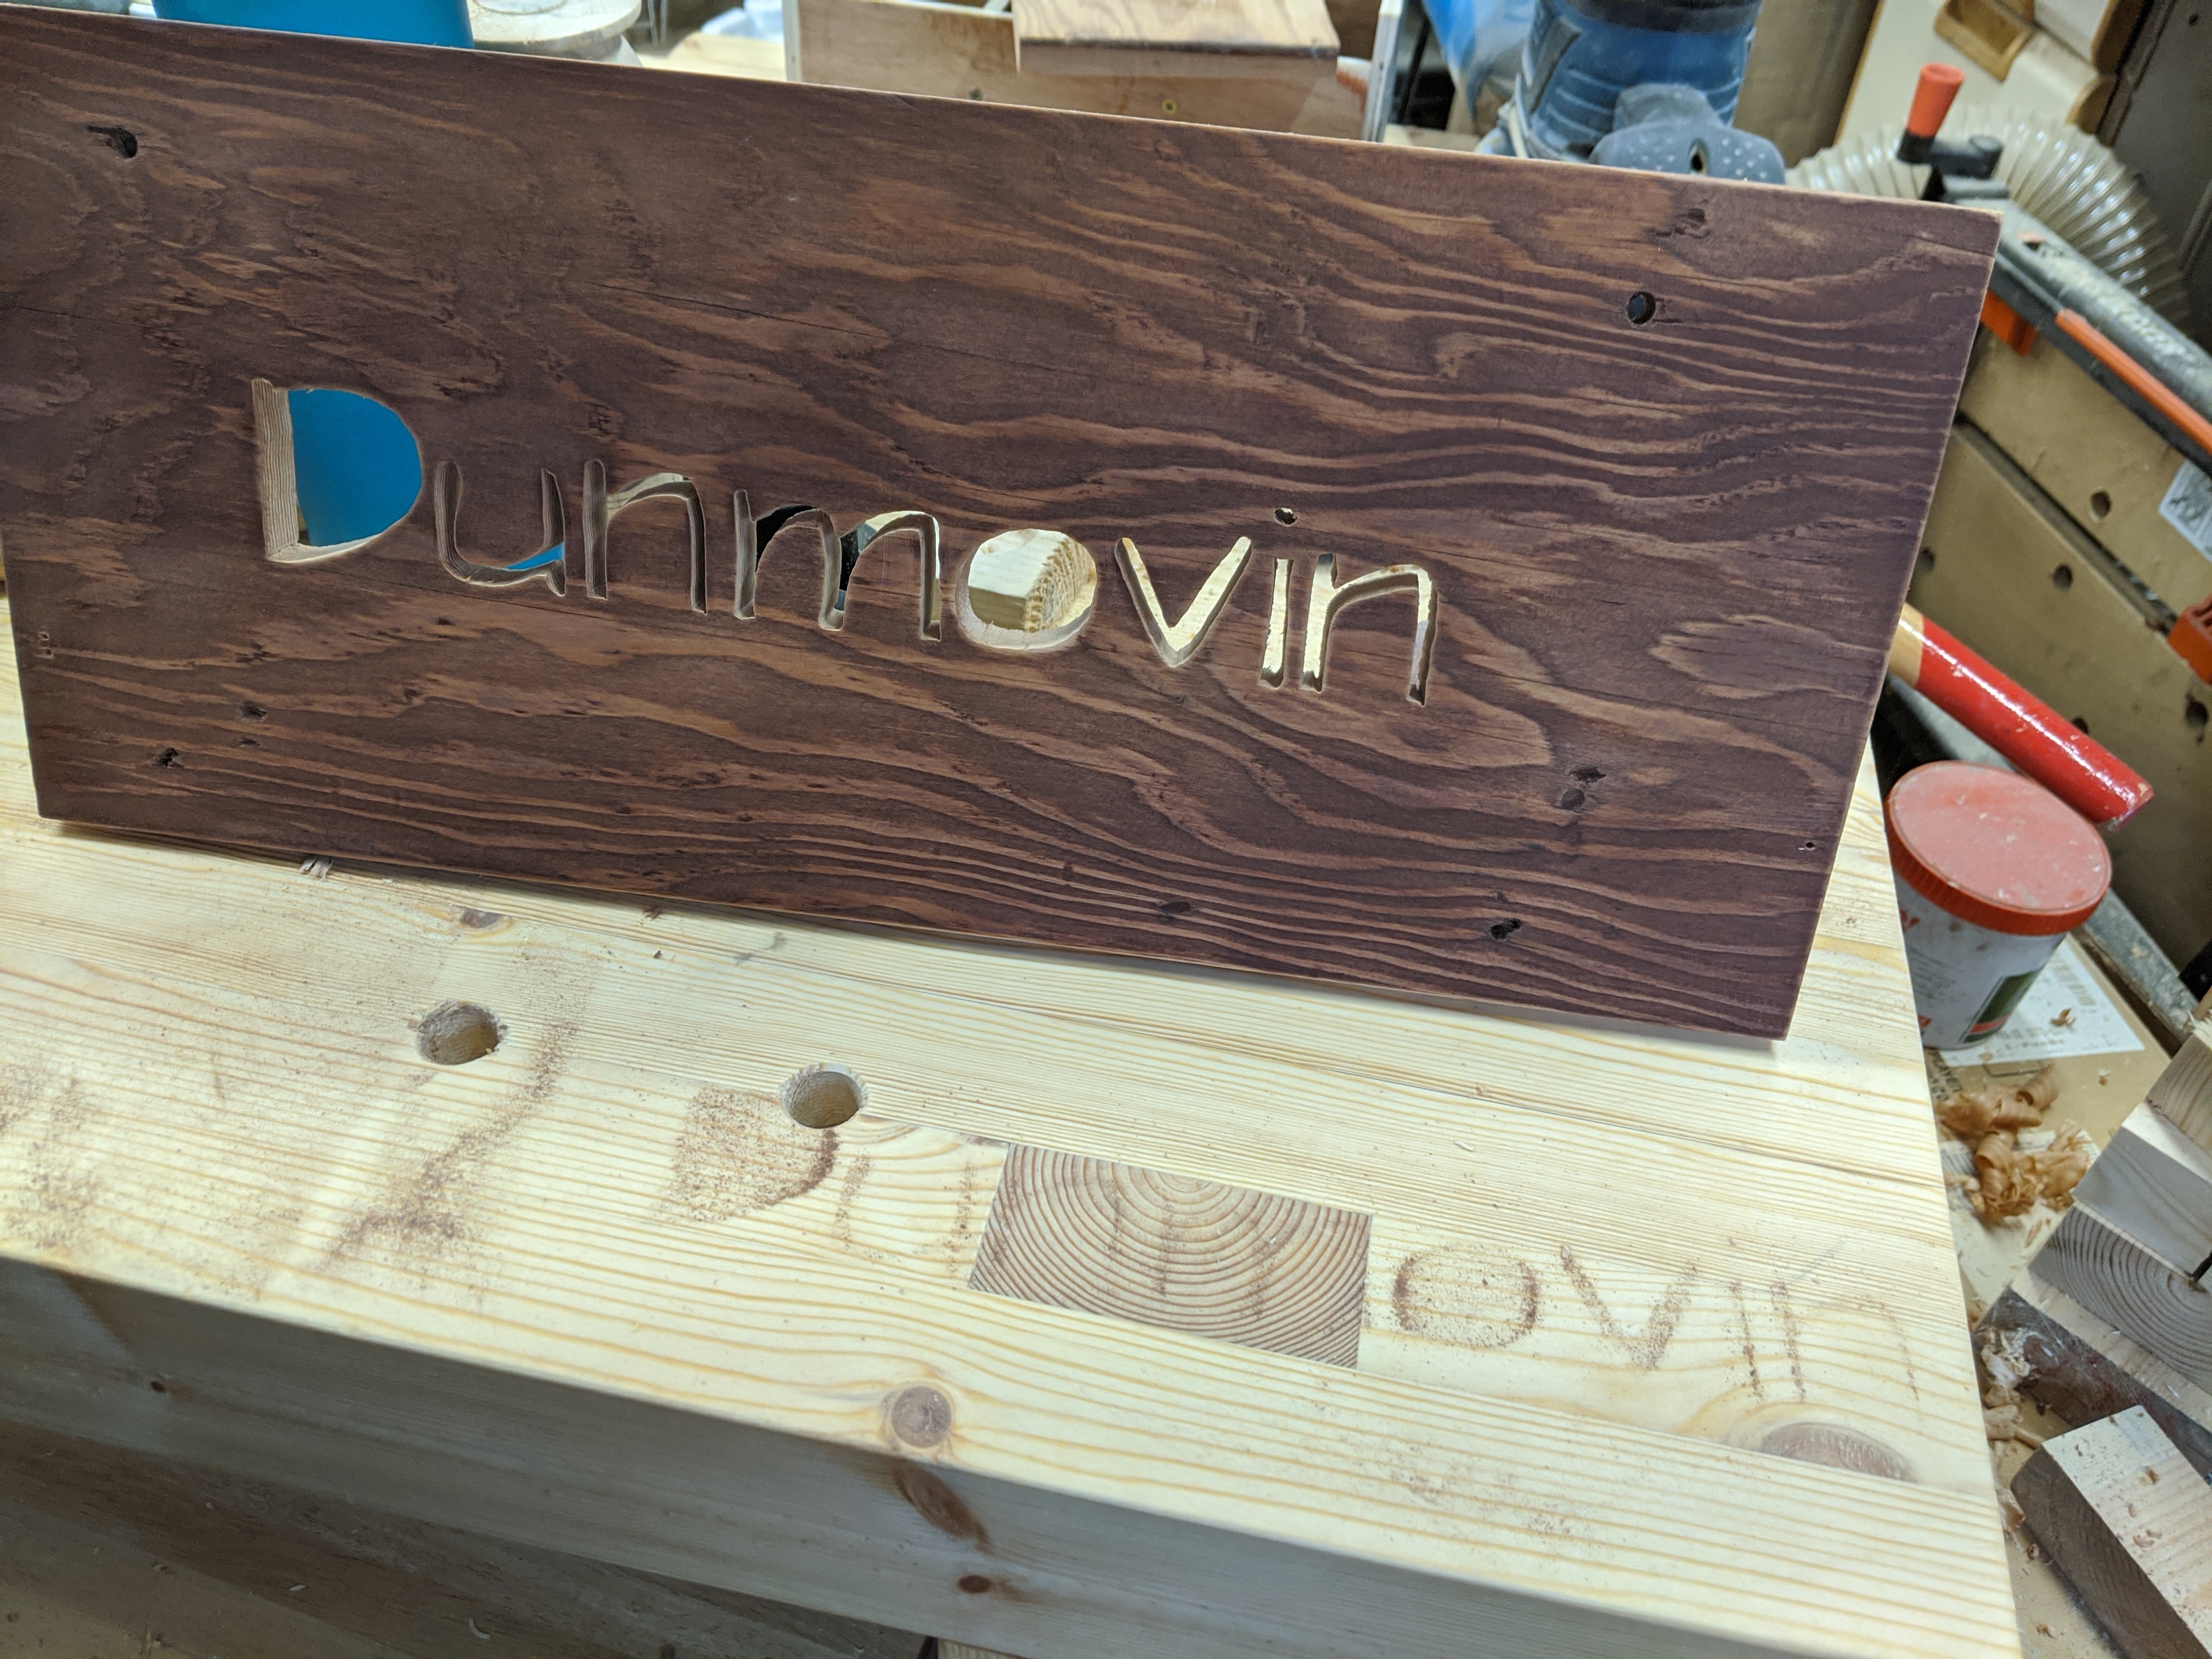
For extra contrast I stained the inlay side of the sign - the part with the holes. Who can see the hidden message in the sawdust ![]()
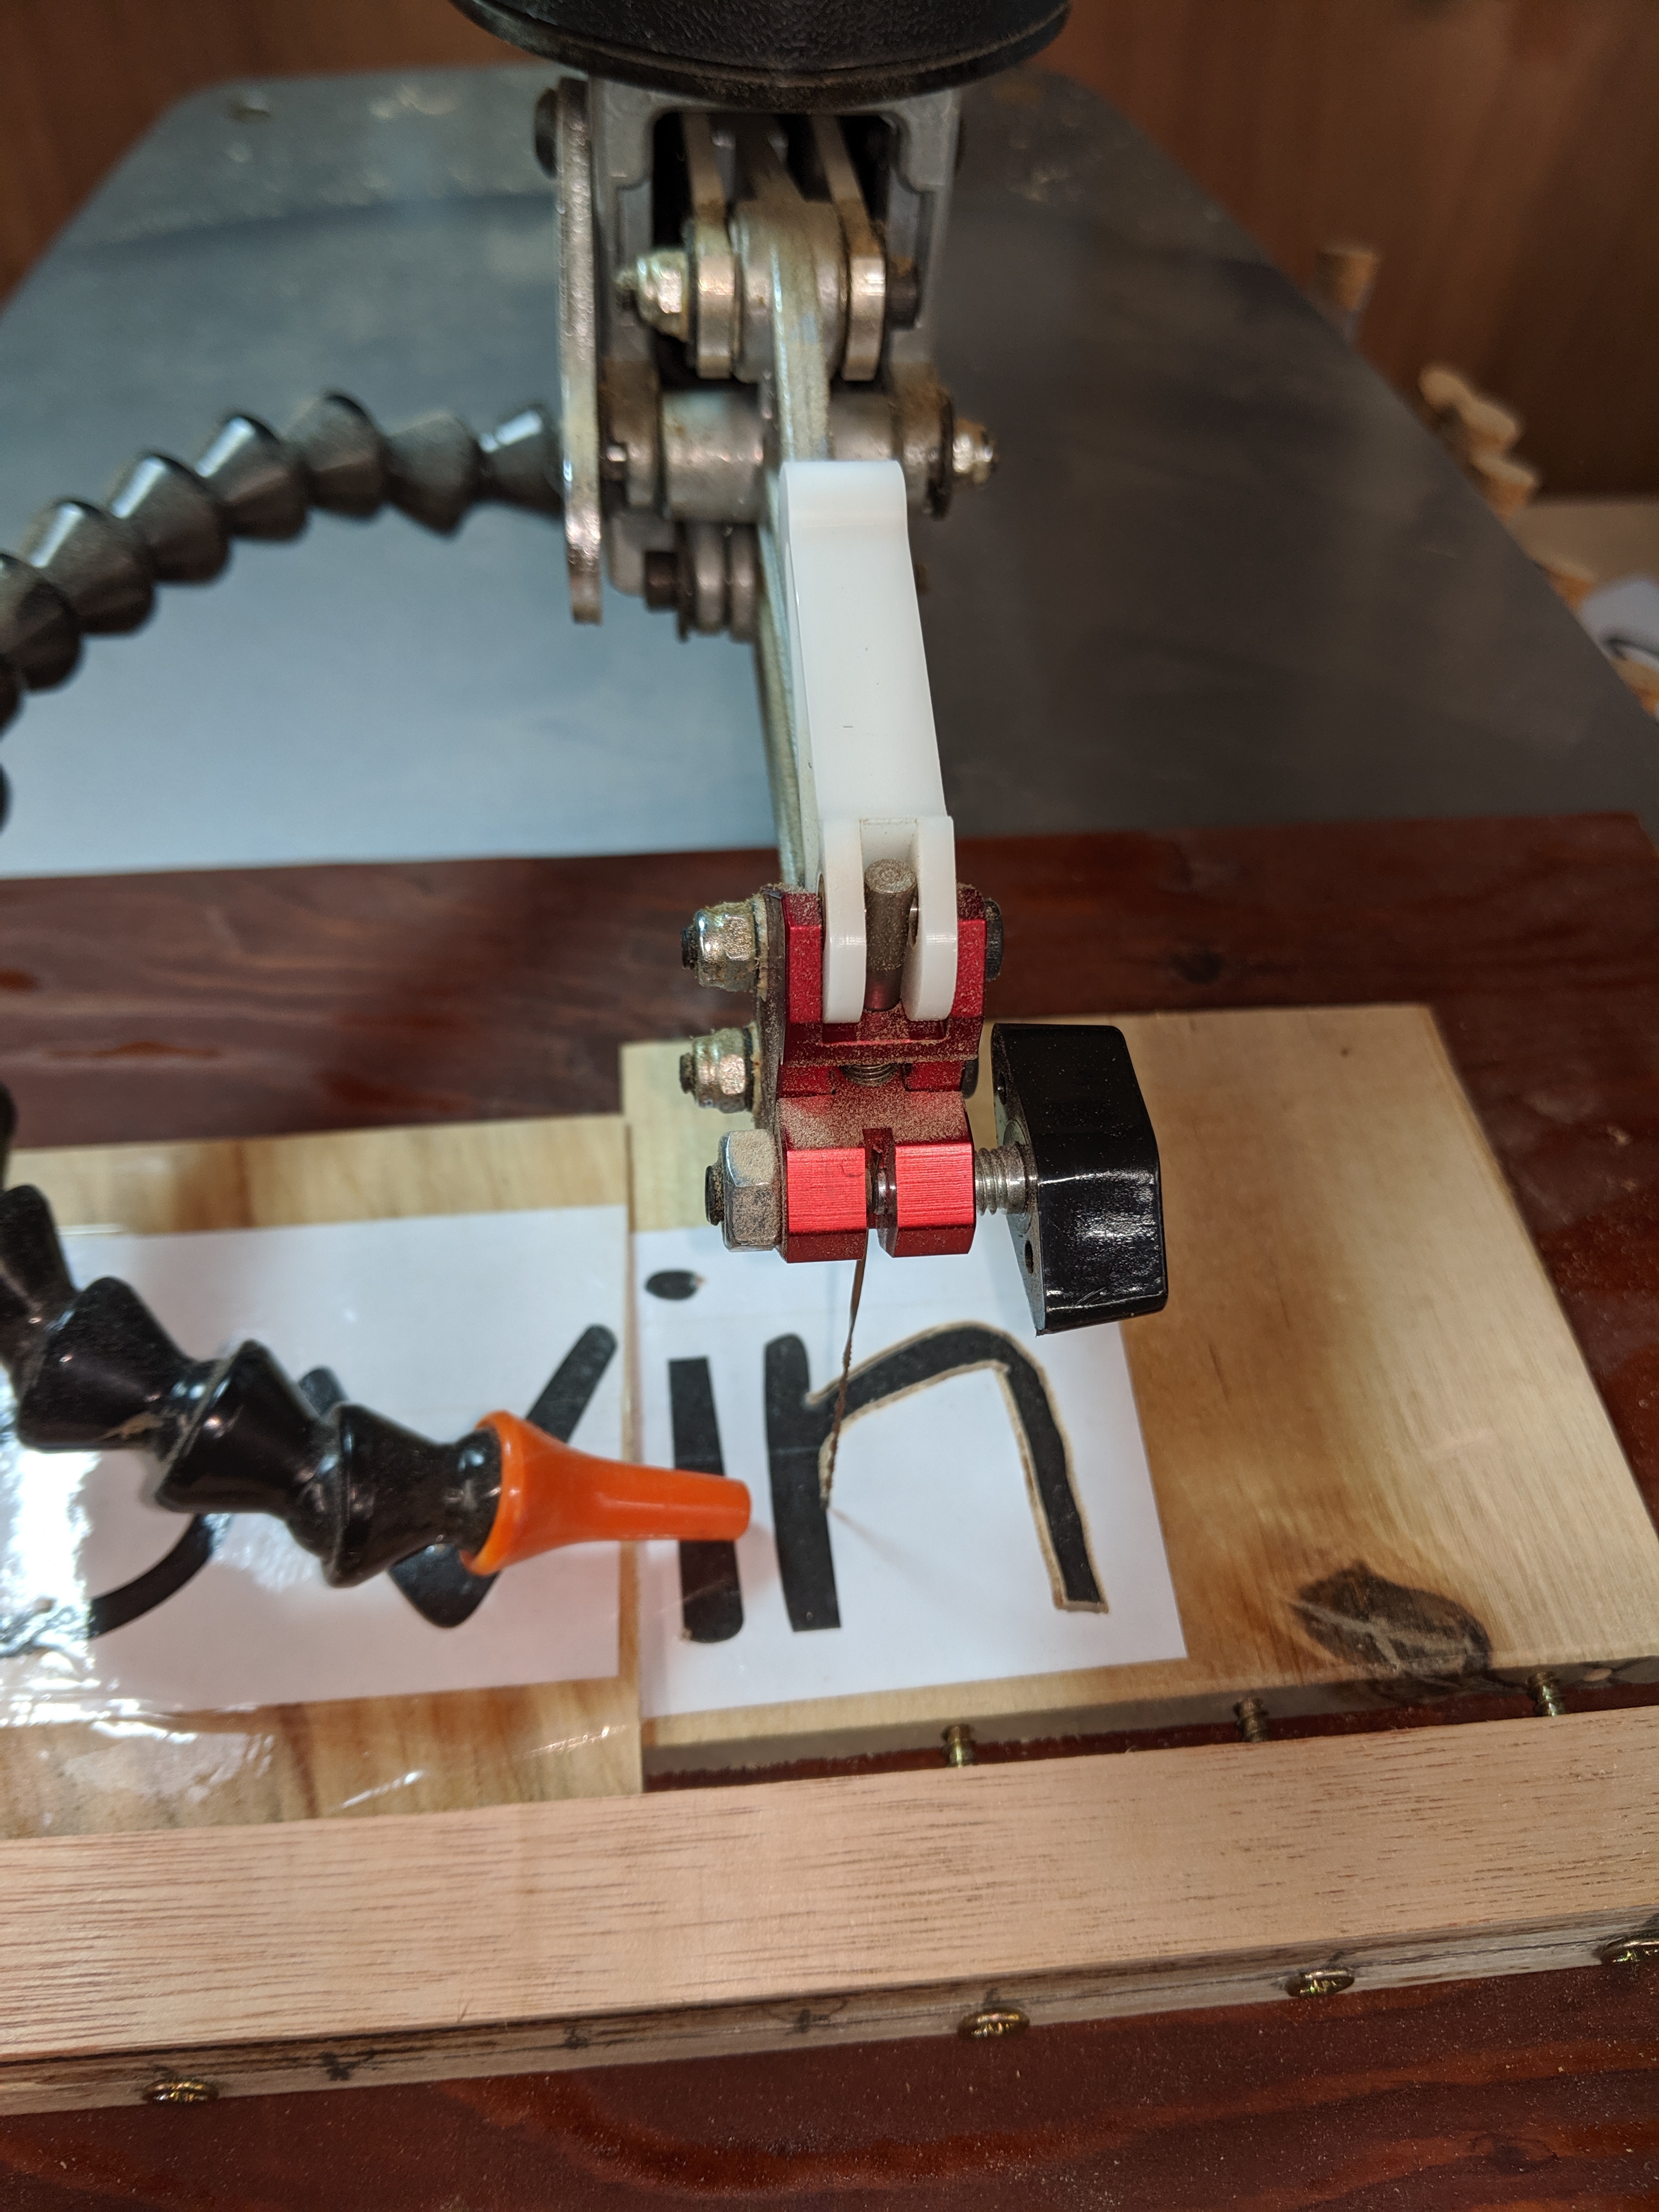
I’m no artist but pyrography is something I’d been curious about for some time. My artistic talent is, umm, limited so tracing is the only way ahead. My daughter has managed some decent freehand horses but then she’s obsessed with them and everything she has is covered with drawings of them … so she’s had plenty of practice.

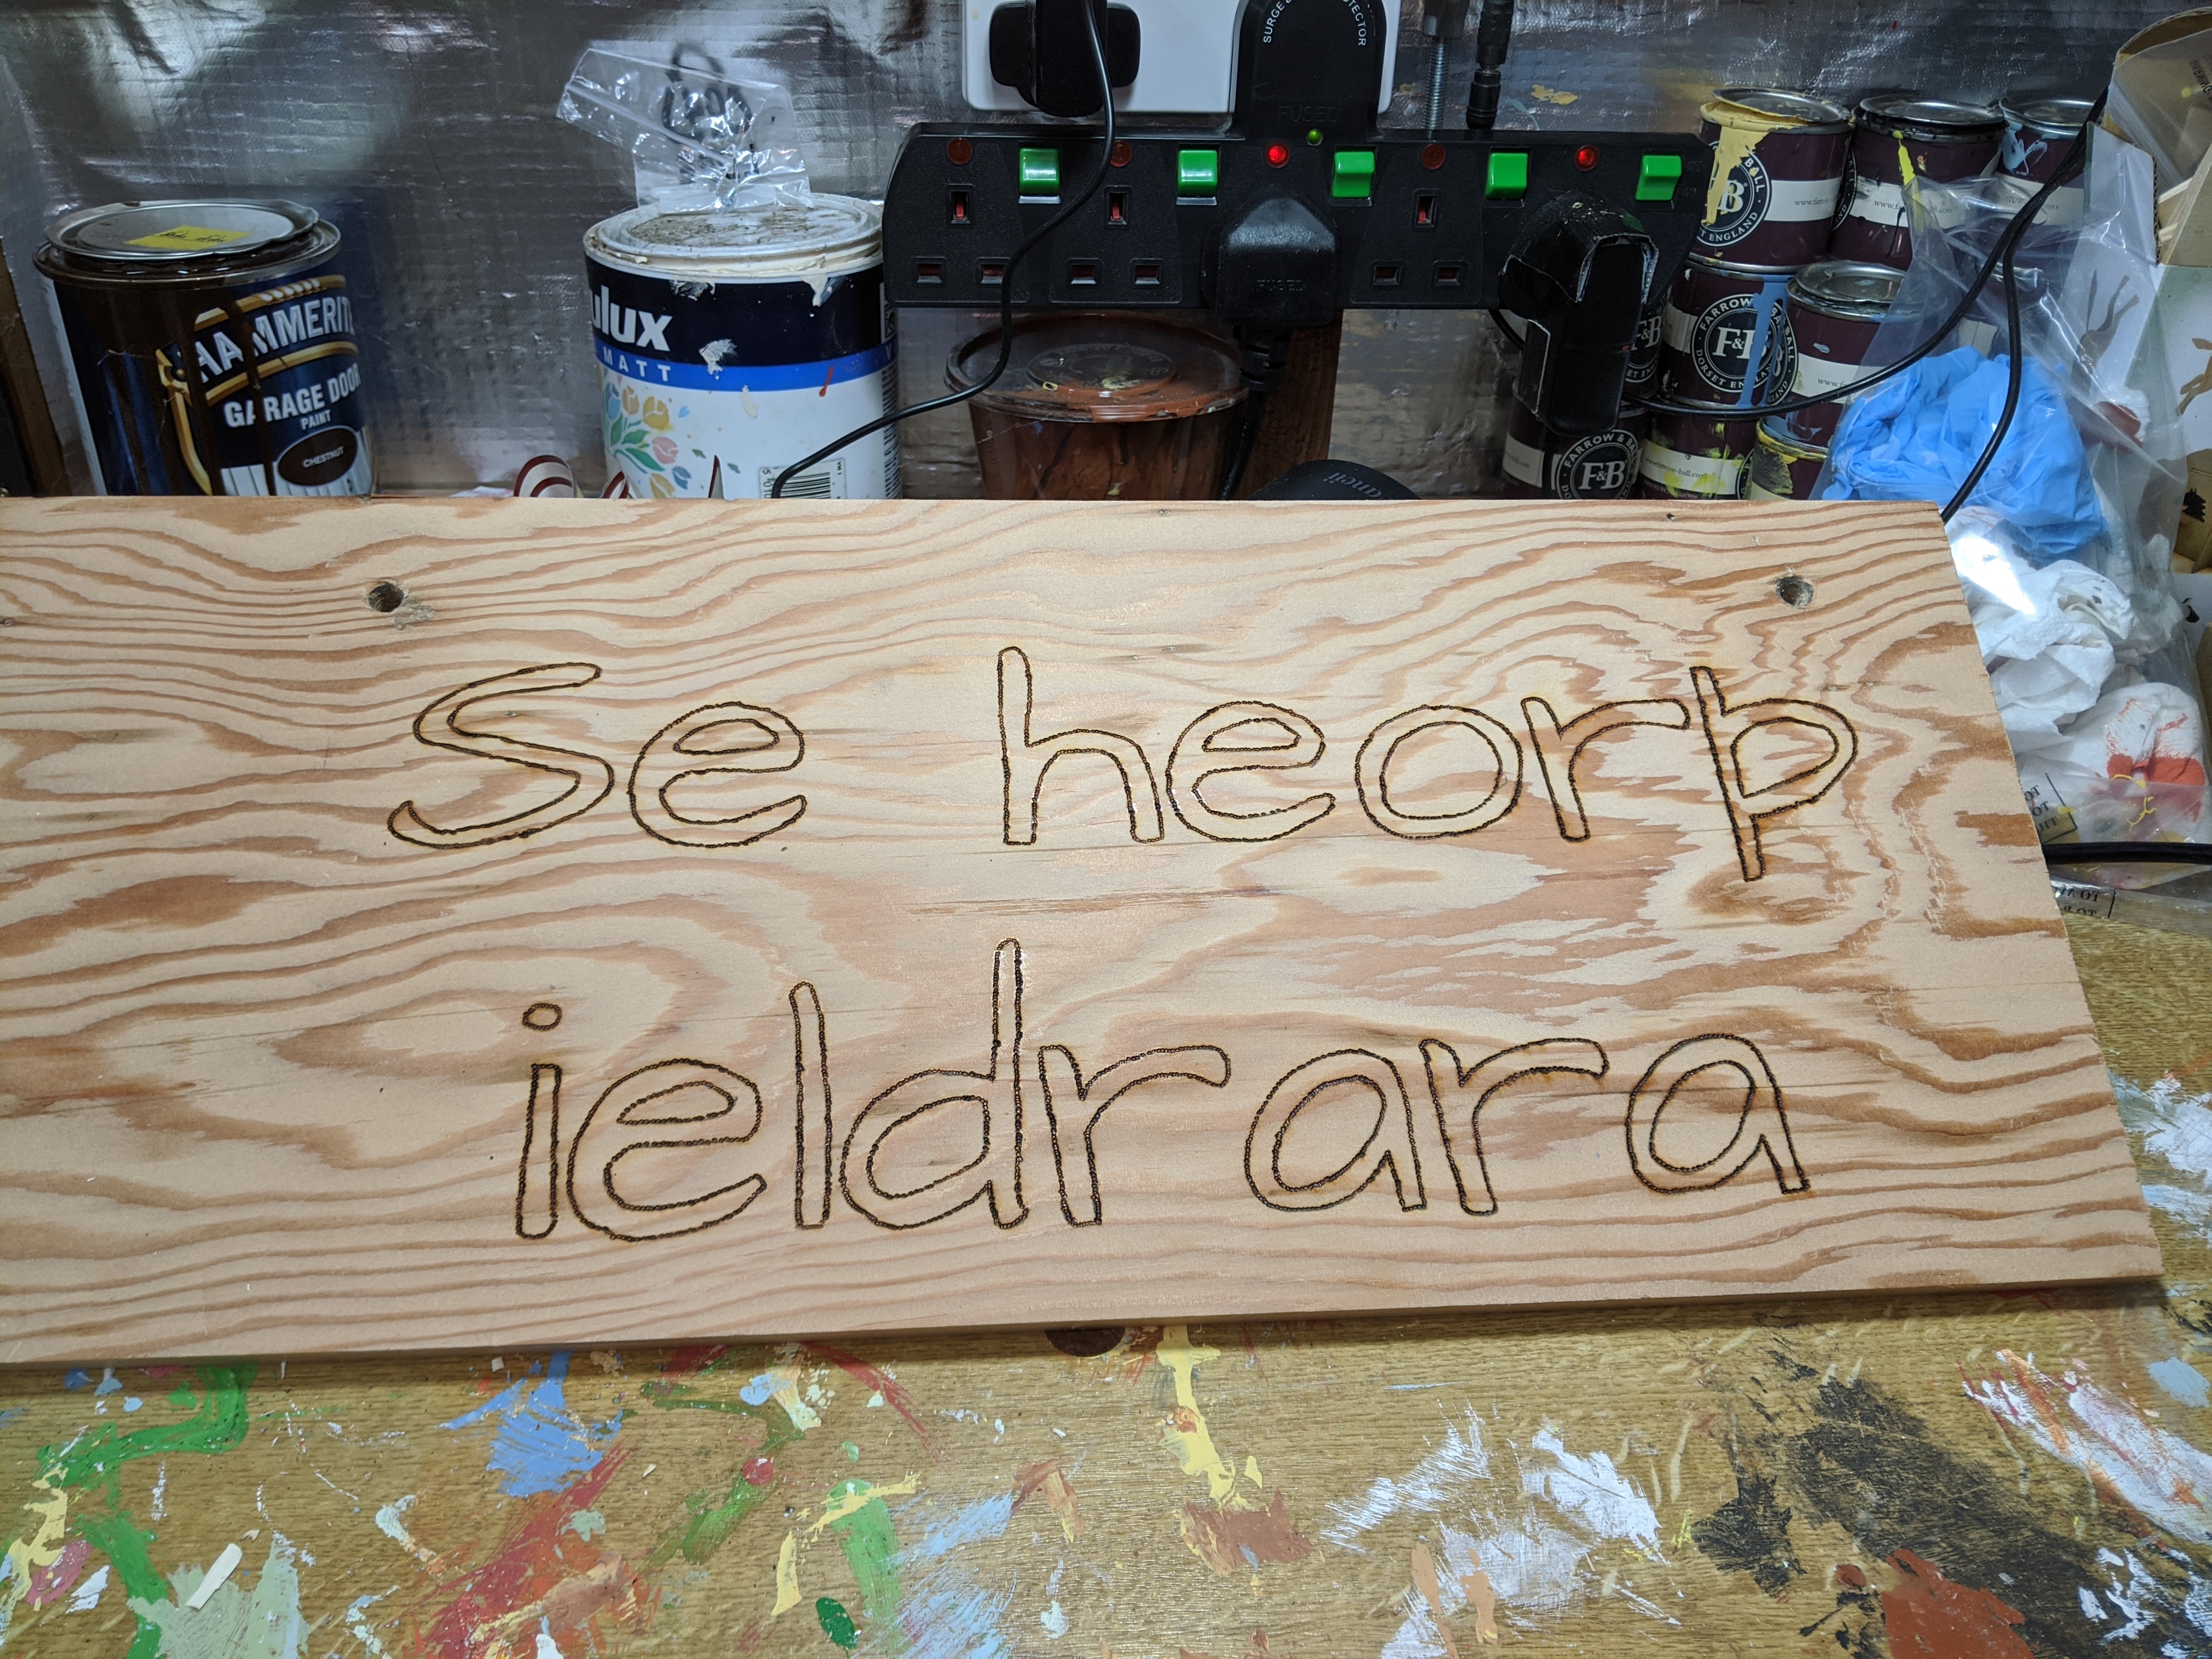
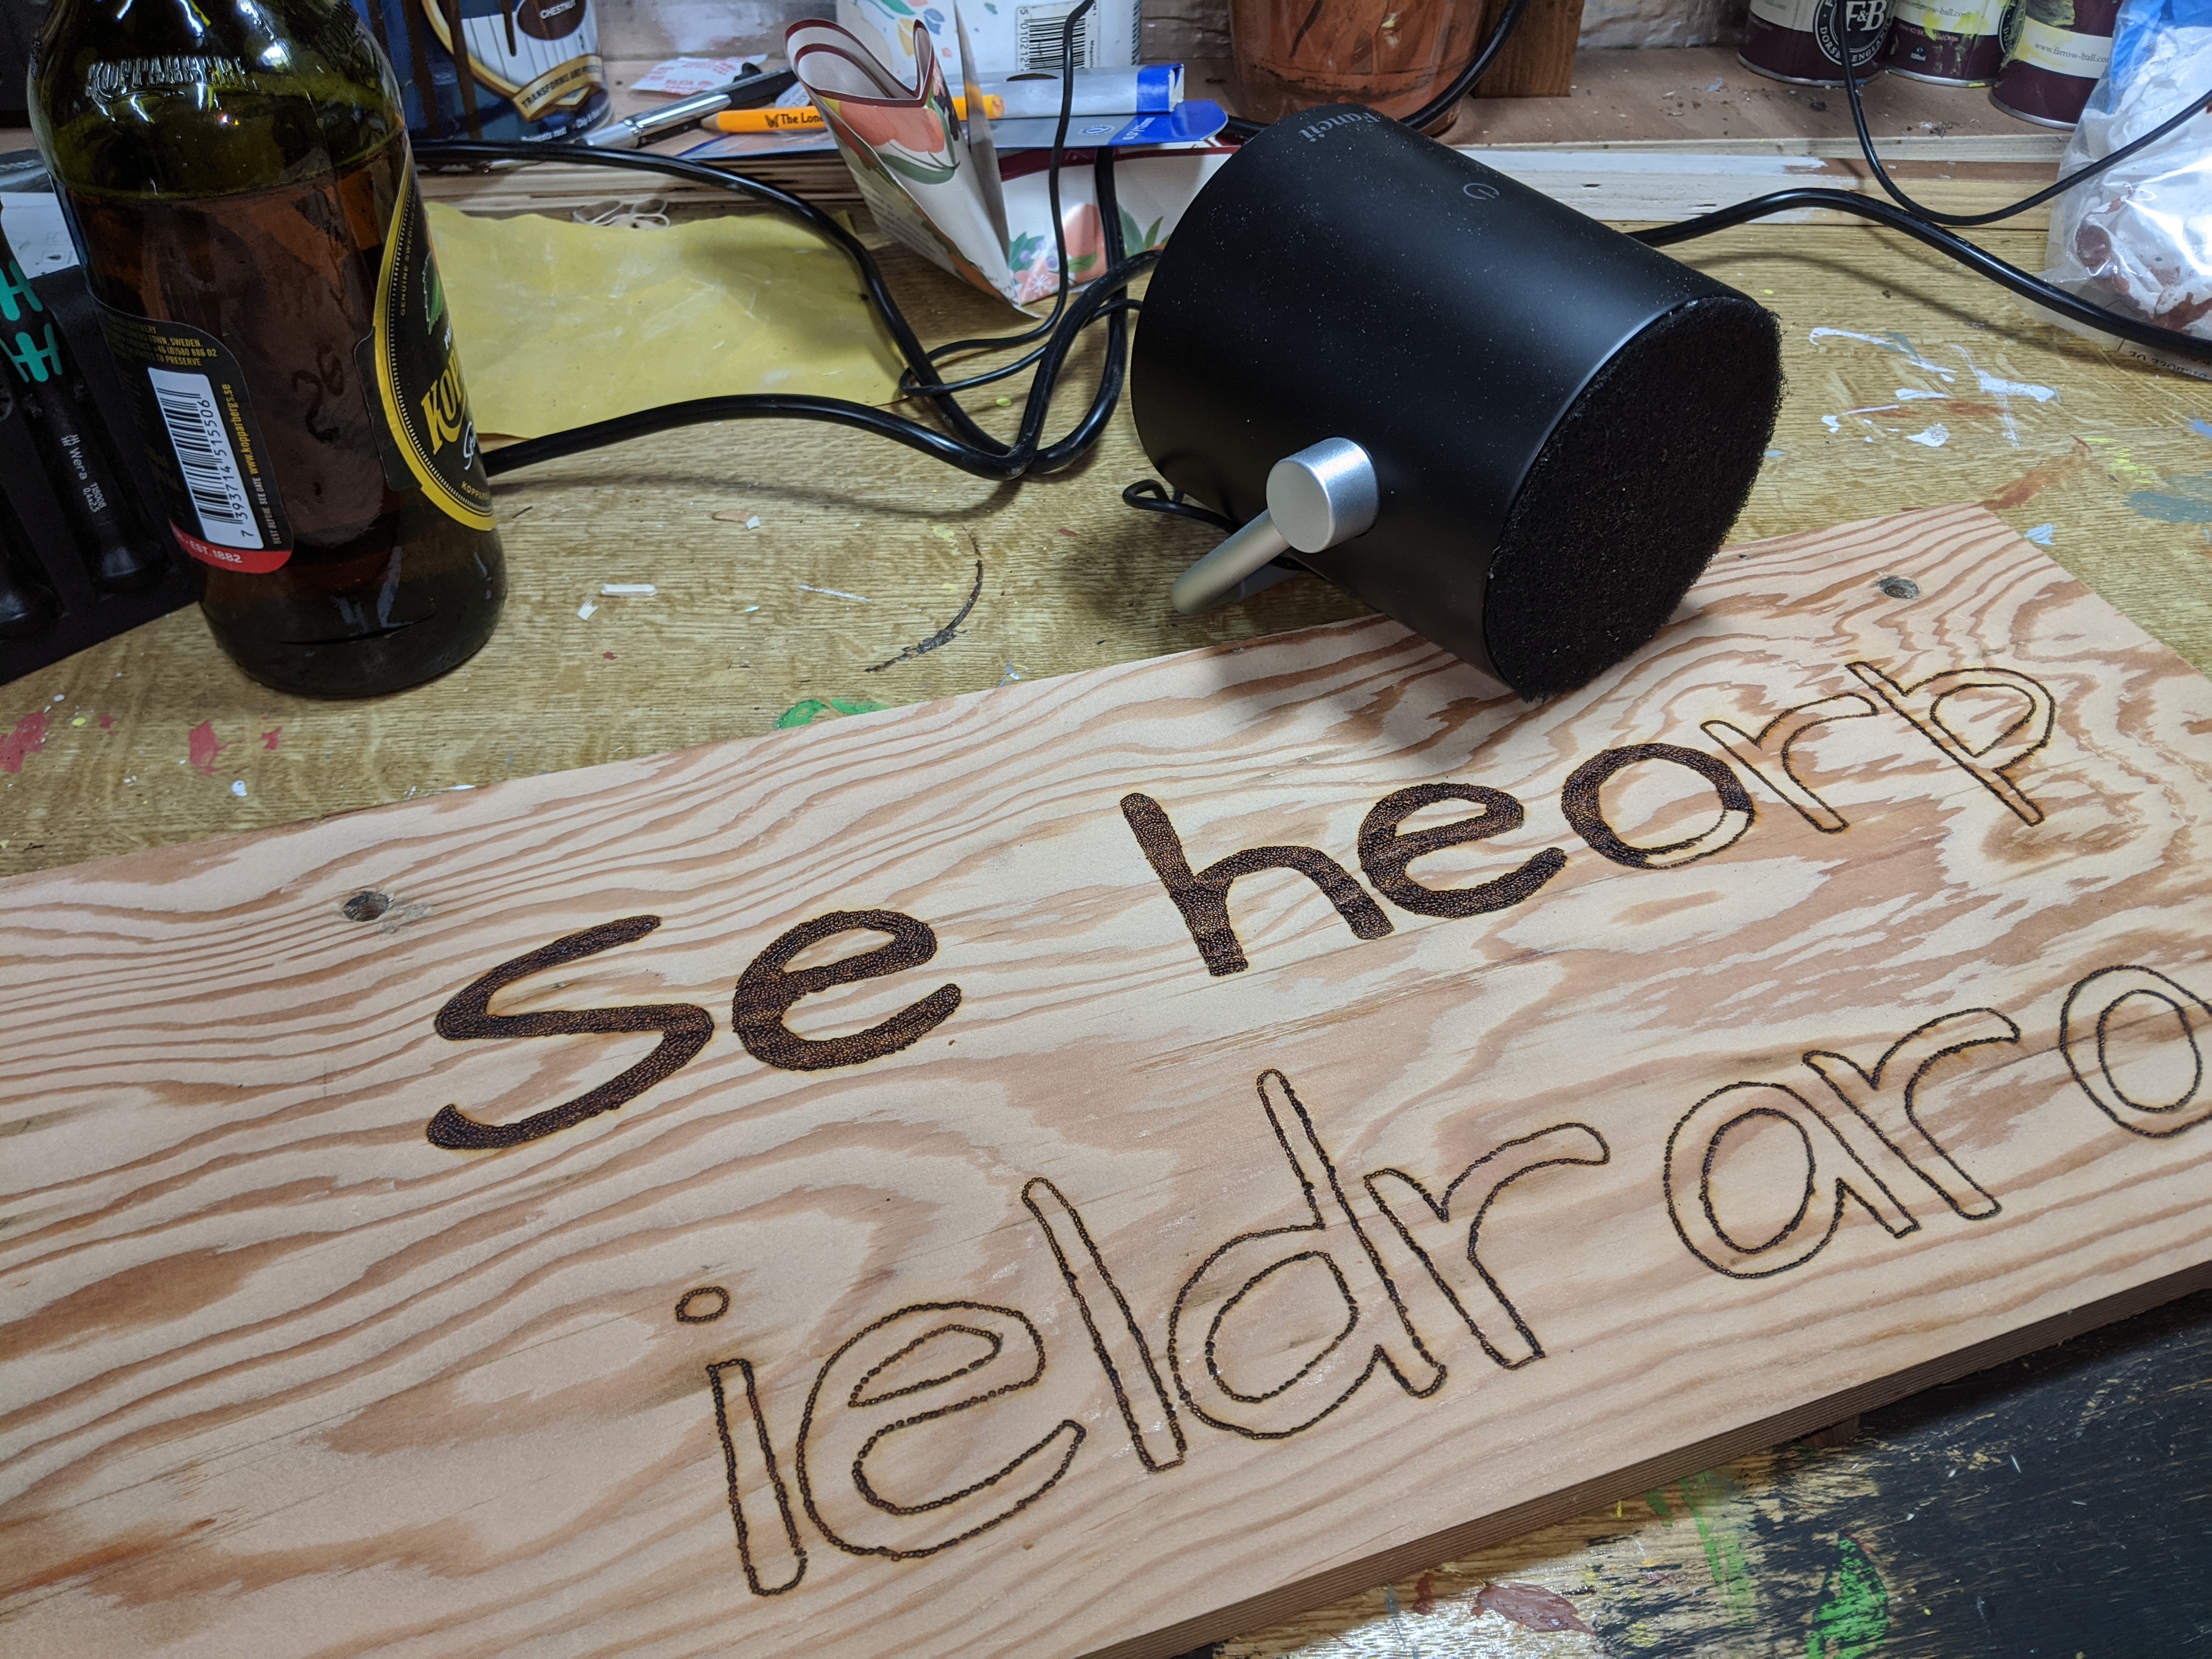
In the end the sign turned out well enough. As I was going I counted the dots I made for one of the letters (it’s a relatively dull process once you’re in the groove). I reckon the whole sign required around 15,000 dots. The pitch pine reacted differently and the tests I made showed dots would be the best solution rather than attempting a more sweeping style with the pen.
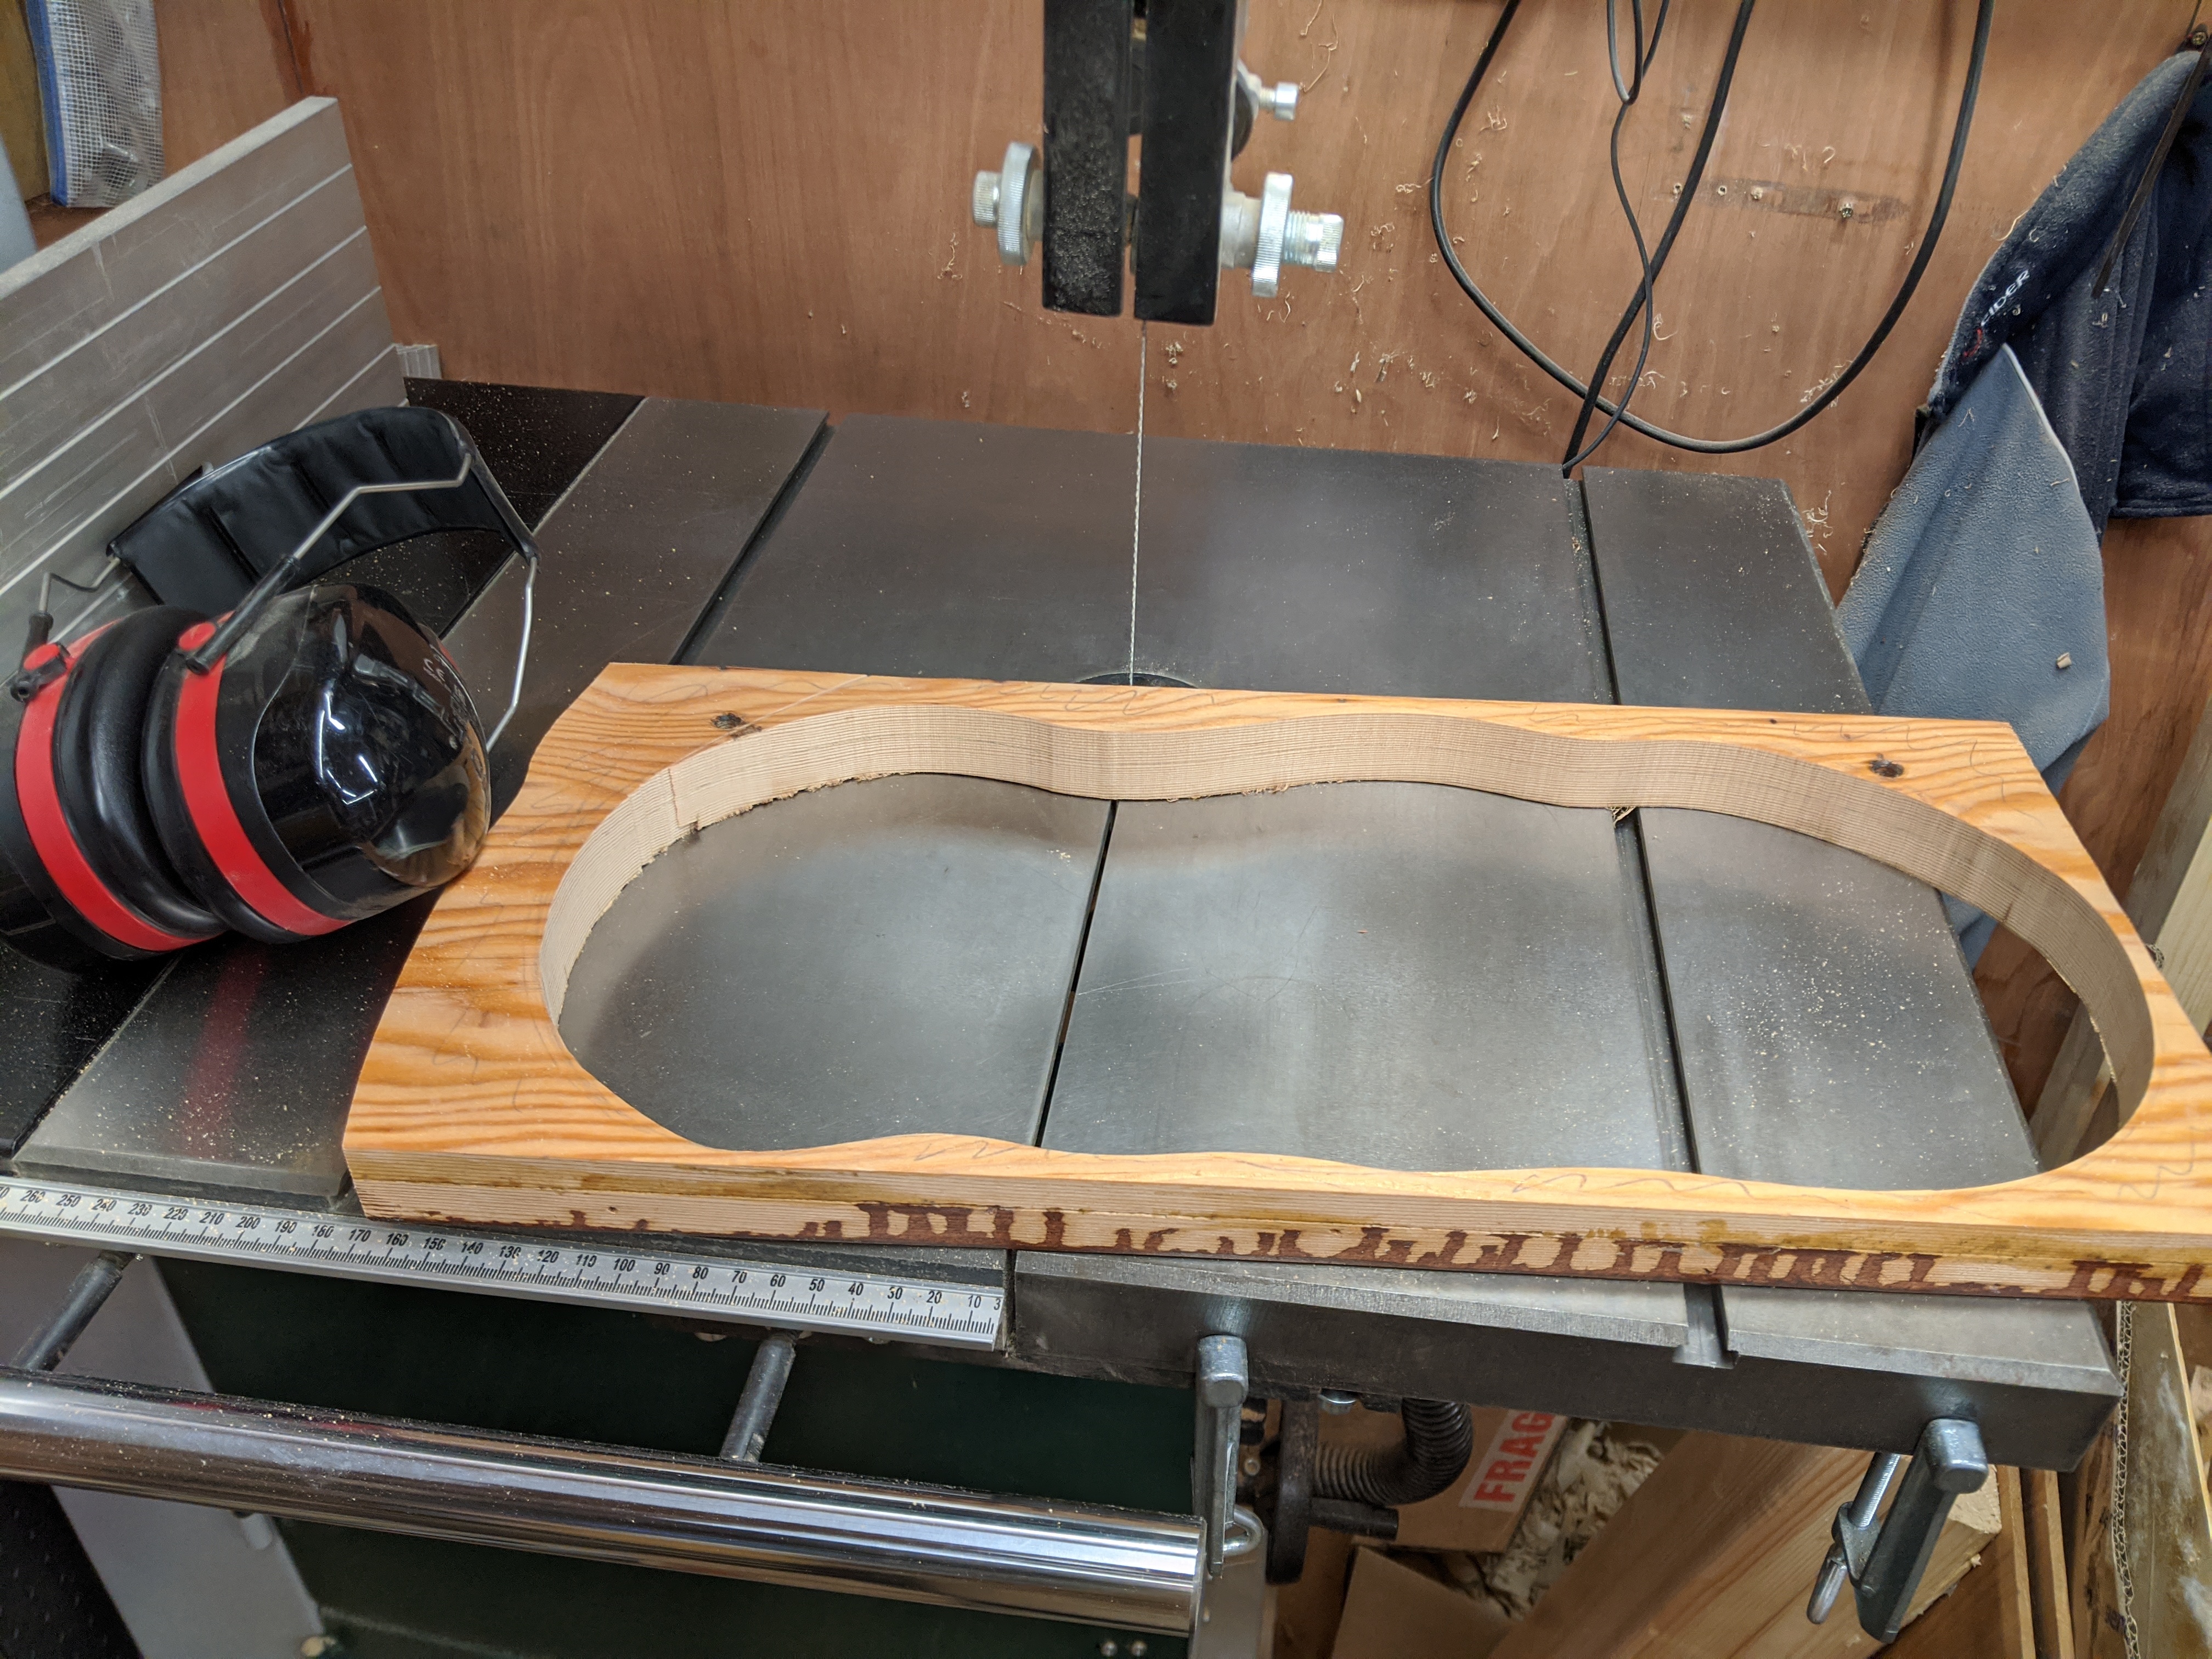
With the two sections glued back together it was time to cut it down to size - the dimensions I’d been given had strict maxima and I thought a non-uniform outline would work well for this type of sign.
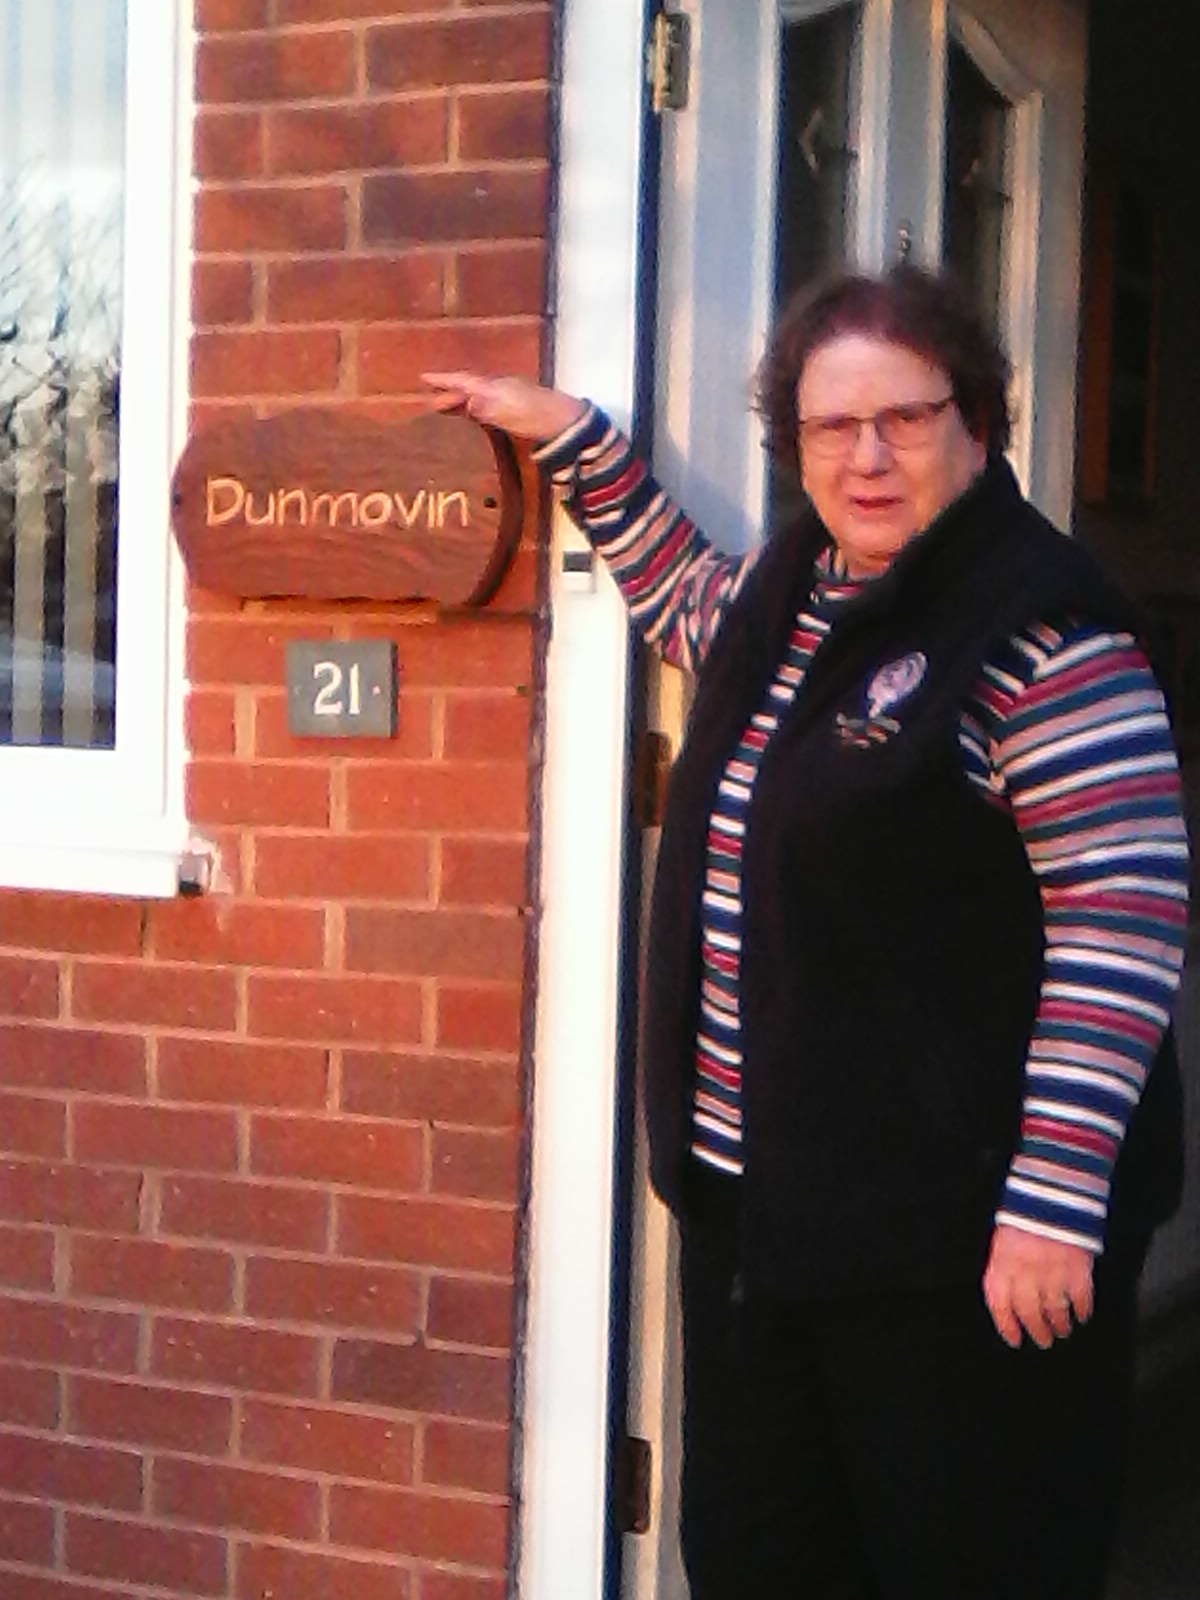
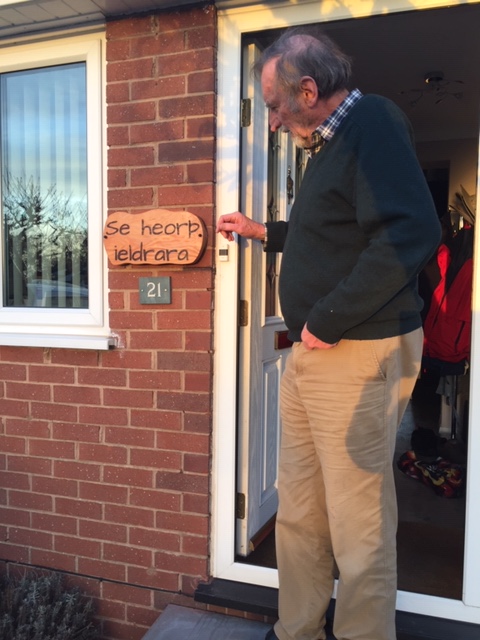
It’s up. The in-laws appear happy with the results. Job done.
Or is it?
No. Having hit the Christmas deadline my dad decided he’d quite like a house sign for his birthday. Another project I definitely can’t turn down and another excuse to try a different technique… We discussed requirements (which boiled down to I want it this sort of size) and I set off thinking about design.
As I said I tend to want to simply crack on with projects like this and see how it goes. If there are problems, I’ll figure out a solution on the fly. Something software engineers sometimes call an agile approach … it’s not a perfect parallel but, hey, this is a blog about woodworking and I’m happy to twist reality to suit my purposes ![]()
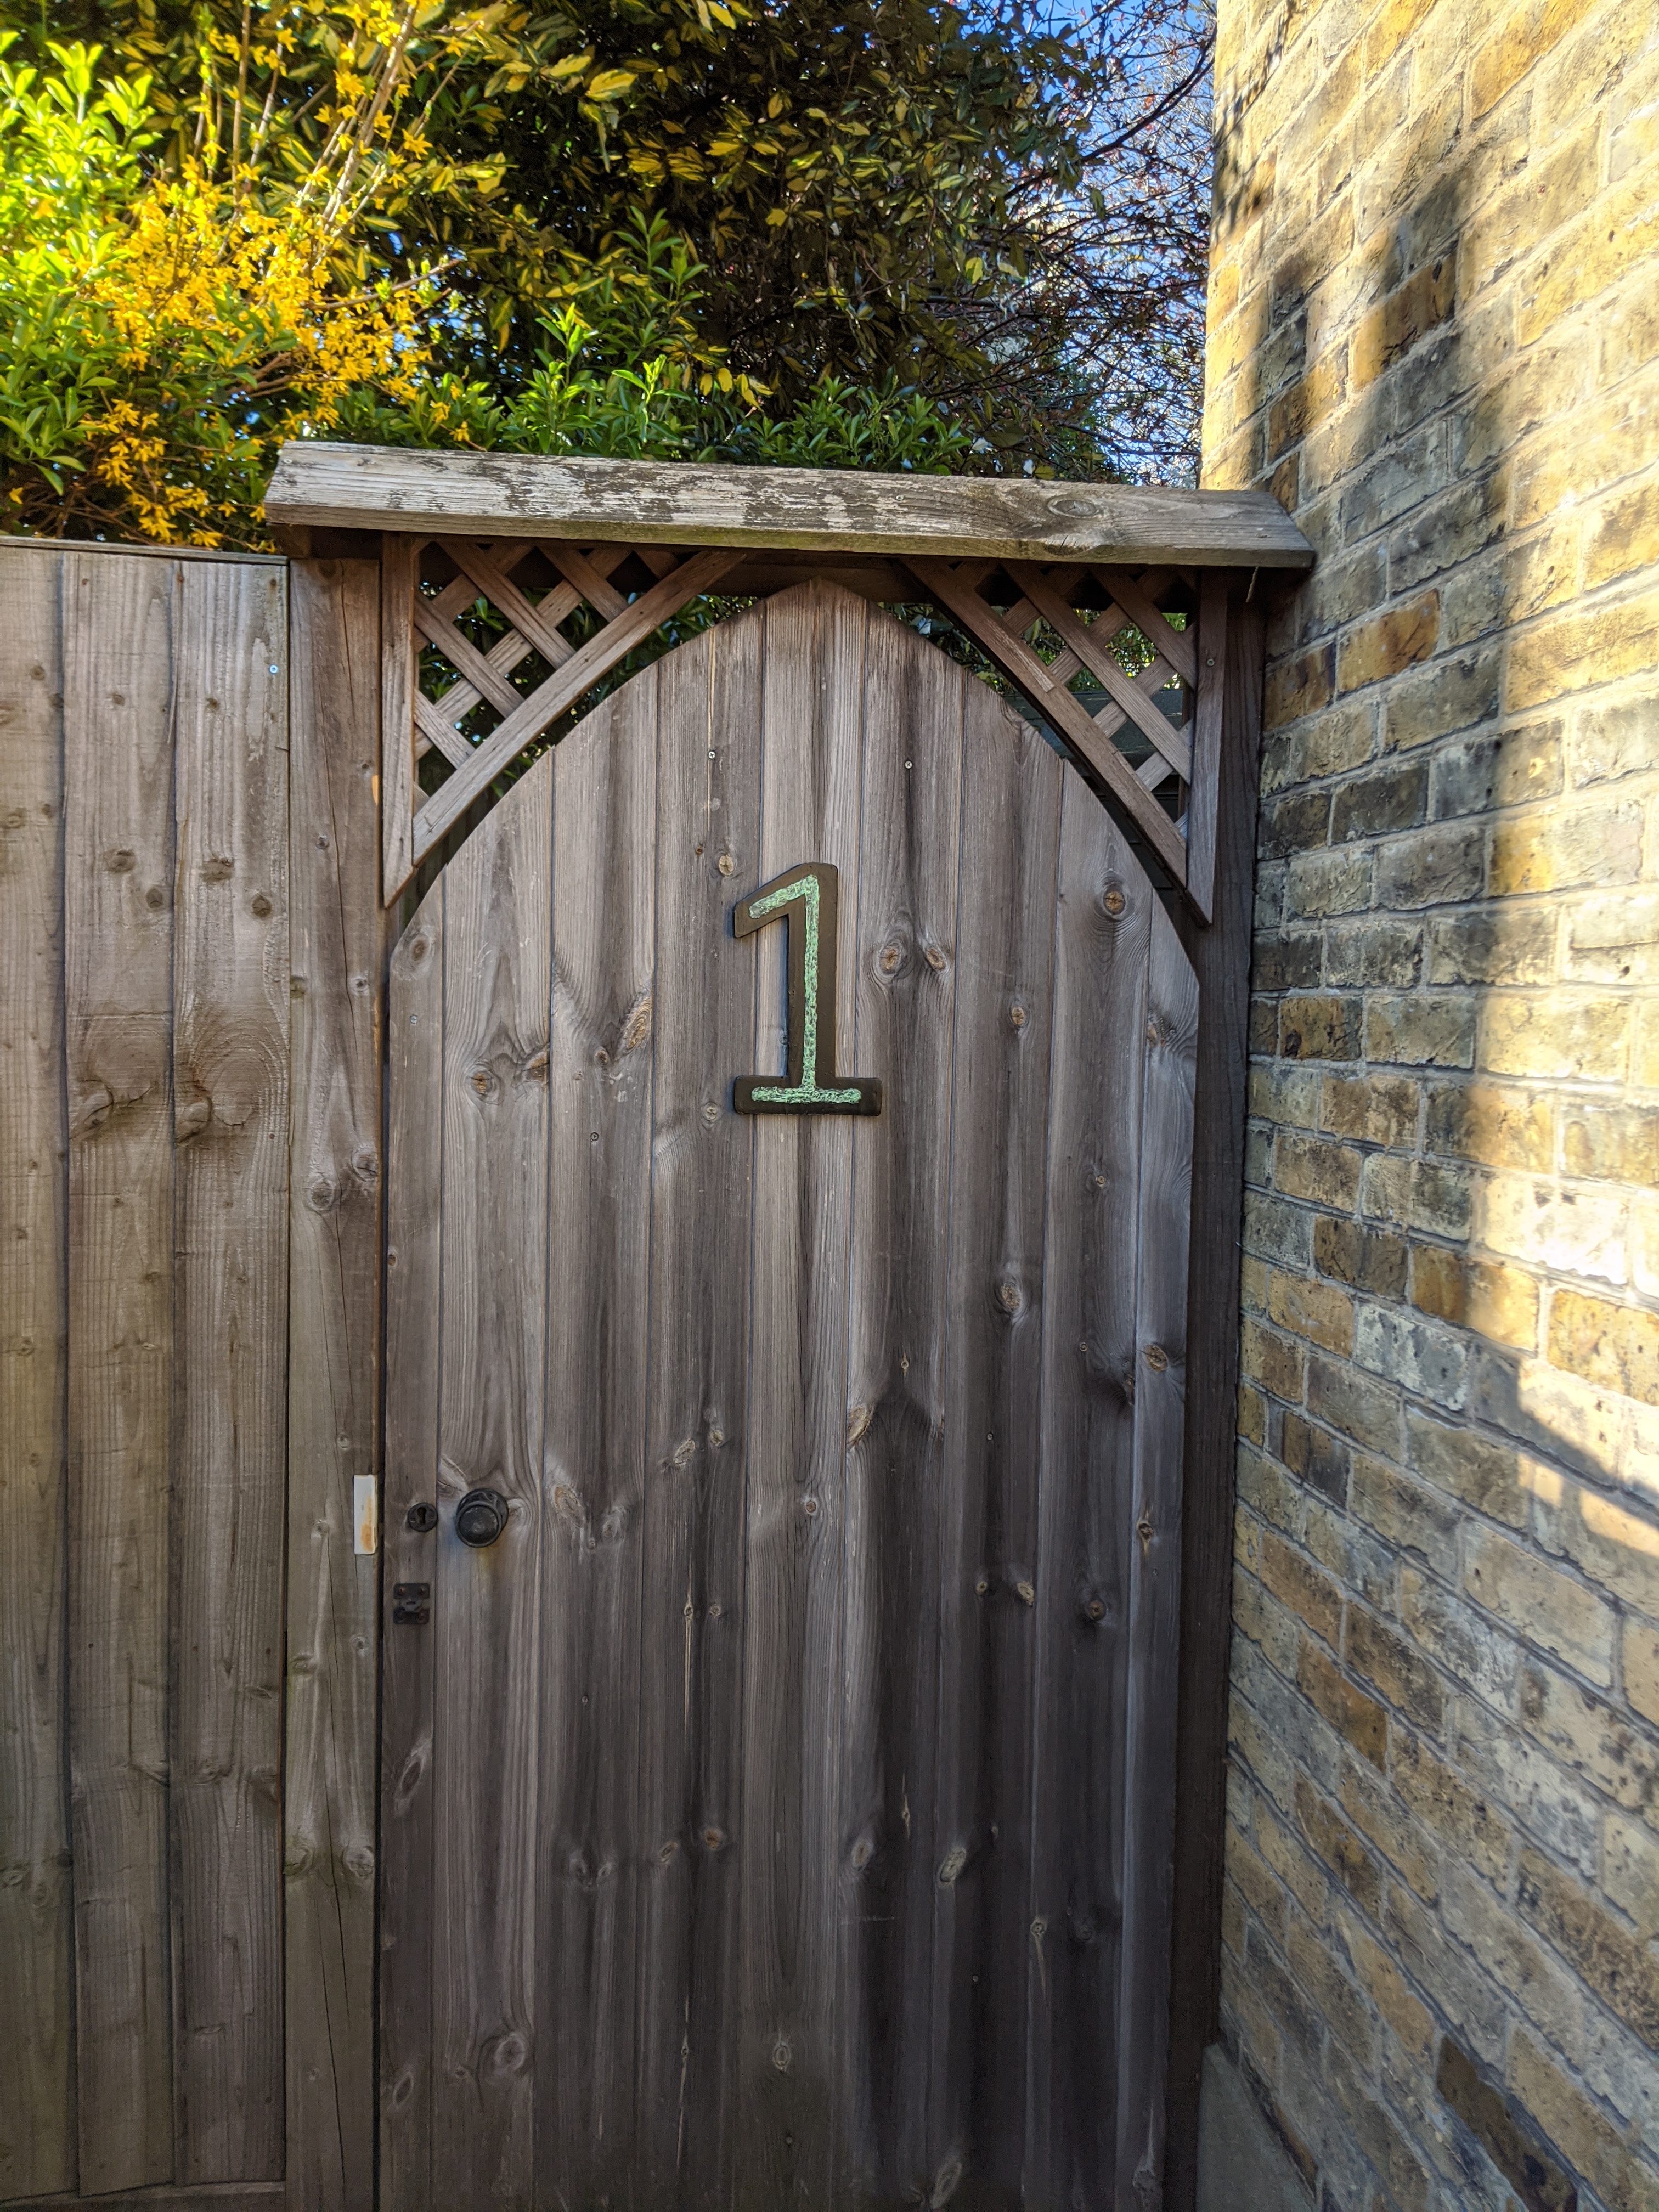
The brief was to create a house sign simply with a number on it. That needed jazzing up. An external wall light provided just the opportunity - I thought we’d take it down and re-use the electrons the copper provided to light up my sign. Some sort of translucent window then; perhaps finally an excuse to try epoxy resin!
The scrap wood I chose for this project came from an old wardrobe of my sister’s. I sanded off the varnish, cut it down to size and scroll-sawed out the number. A lick of paint (black on the front and white on the back) and it’s time to move on to the back of the sign. More wardrobe, more white paint.
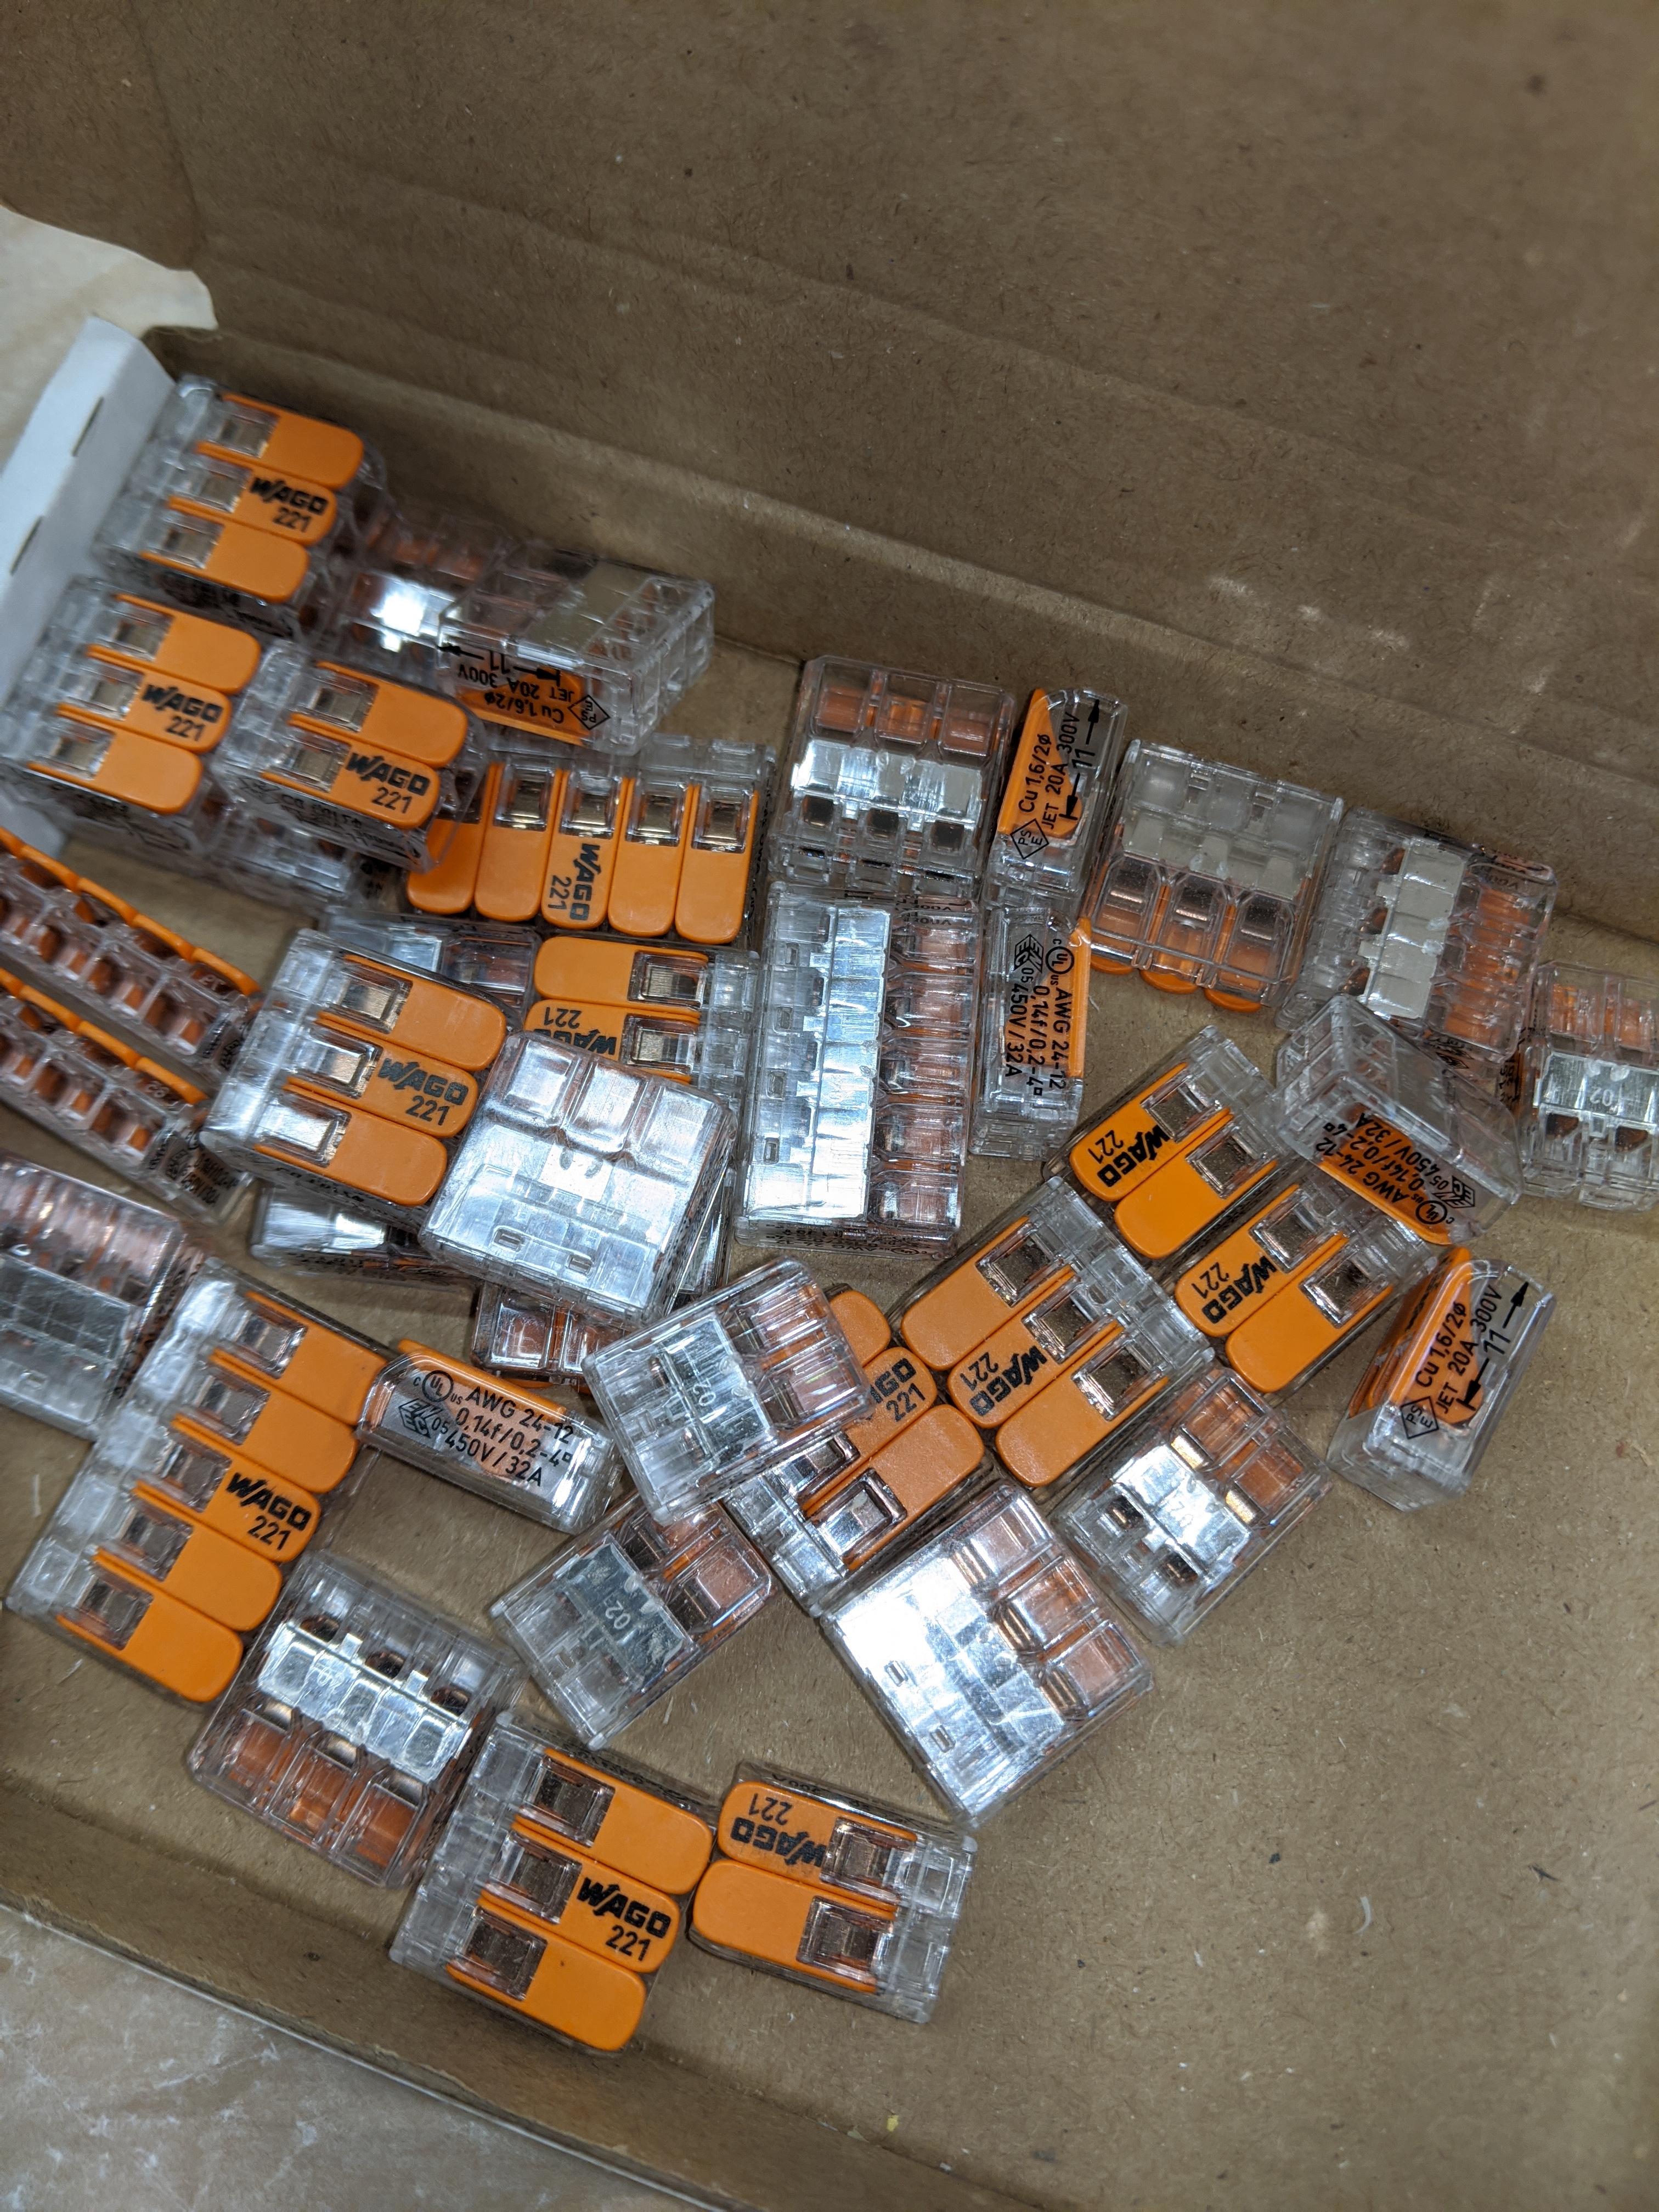
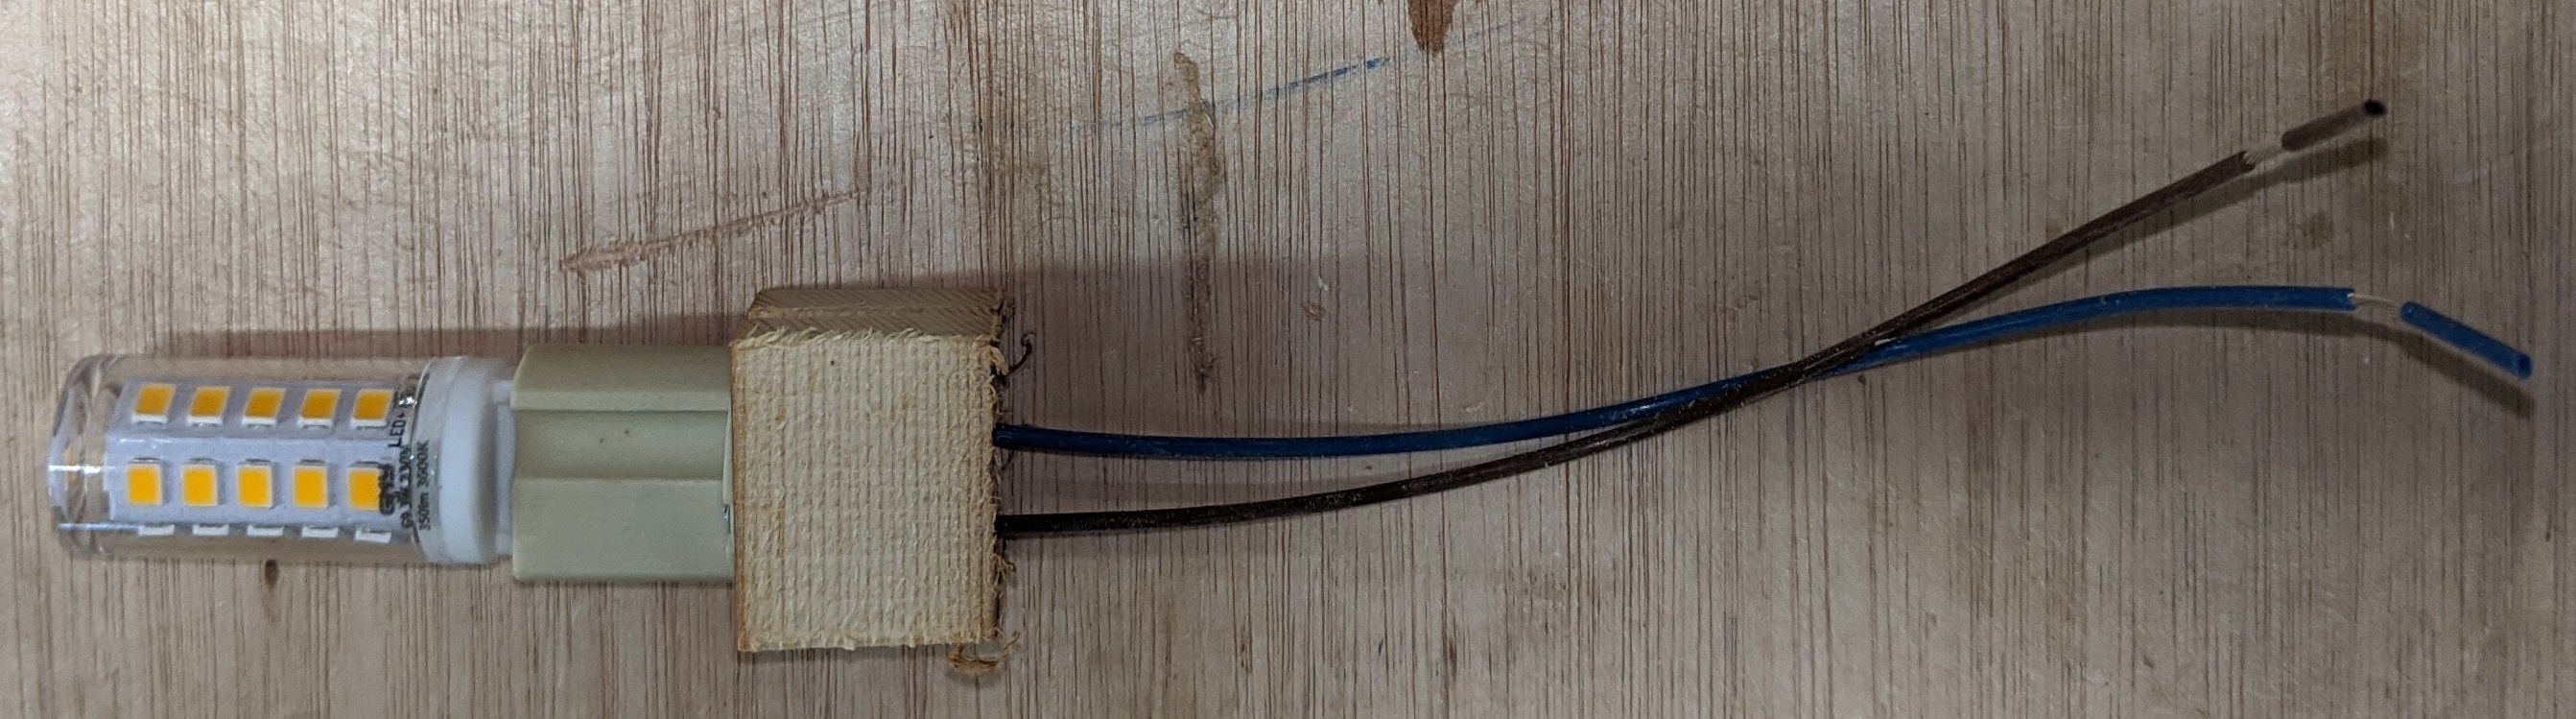
Five LED lamps and holders held in place with that’ll do hot glue and wago connectors for the angry pixies. Hook it up to the mains and let there be light.
Now for the new bit. Epoxy resin. I carefully weighed out the components in a 1:2 ratio as instructed. Then added some (yellow) colouring that I’d ordered at the same time. Lots of stirring and we’re ready to pour. Hmm, I’m doing this in the house rather than the shed (the curing process requires warmth, something sadly missing from the shed in January), maybe I should put something under the sign just in case a little bit leaks out beyond the acrylic I’ve screwed (and silicone’d) to the back of the sign.
Phew. A lot leaked out. But enough stayed in to cure and keep out rainwater.
However.
I’d used, err, slightly too much colouring so the effect was more wall than window. This is where some experimentation would’ve been useful but I like JFDI. Plan B required. I could remake the front but I don’t fancy doing that. I could try knocking out the epoxy and re-doing it but I’ve no faith that’ll turn out well.

Of course if it all goes properly Pete Tong I’ve still got the scroll-sawed-out lump of wood. Painted black, then with glow-in-the-dark paint (which is more like chalk, goes on gloopy then dries cracked; I’m sure there’s a technique I’m missing … probably patience), then varnished it doesn’t look bad. That’ll do for the sideway door…

Maybe I could make it into a starscape. Dad likes stars. He had a telescope once. That’ll do. I’ll do it tomorrow.
A couple of weeks later I thought I’d get back to the sign. But by then my brain had had enough time to turn the idea over and adjust it. Instead of random holes for stars, proper constellations would be cooler. Which ones? Easy: constellations from the signs of the zodiac representing our family. Find constellations on t’internet, print out suitable patterns, stick on, drill out. Great, now the front of my sign looks neat if I say so myself but the holes would probably allow rainwater to let the pixies out so some sort of waterproofing is in order.
One layer of clear epoxy (same 1:2 ratio but no colouring) to be poured - should be trivial, right? Umm, not quite. Not only did I have to use a pin to make sure the epoxy went into every hole but I also used my turbo-hairdryer to pop air bubbles. That was a slightly tedious twenty minutes but it did come out reasonably well. There is one air bubble left but you won’t see it in the photo and I doubt anyone other than me will ever see it. Good enough.
At this point however I felt five LED lamps weren’t enough so upped it to nine - one per constellation.
So now I have the front and rear. But no idea how to put the two together. I tried a couple of things in the shed but in the end decided a simple wooden frame looked best. The wood I used this time was Western Red Cedar left over from when our house was re-clad. It’s good looking stuff and weathers to grey nicely. The main advantage is no need for finishing (paint / varnish / etc.) as it’s naturally oily and doesn’t rot when left out to the elements.
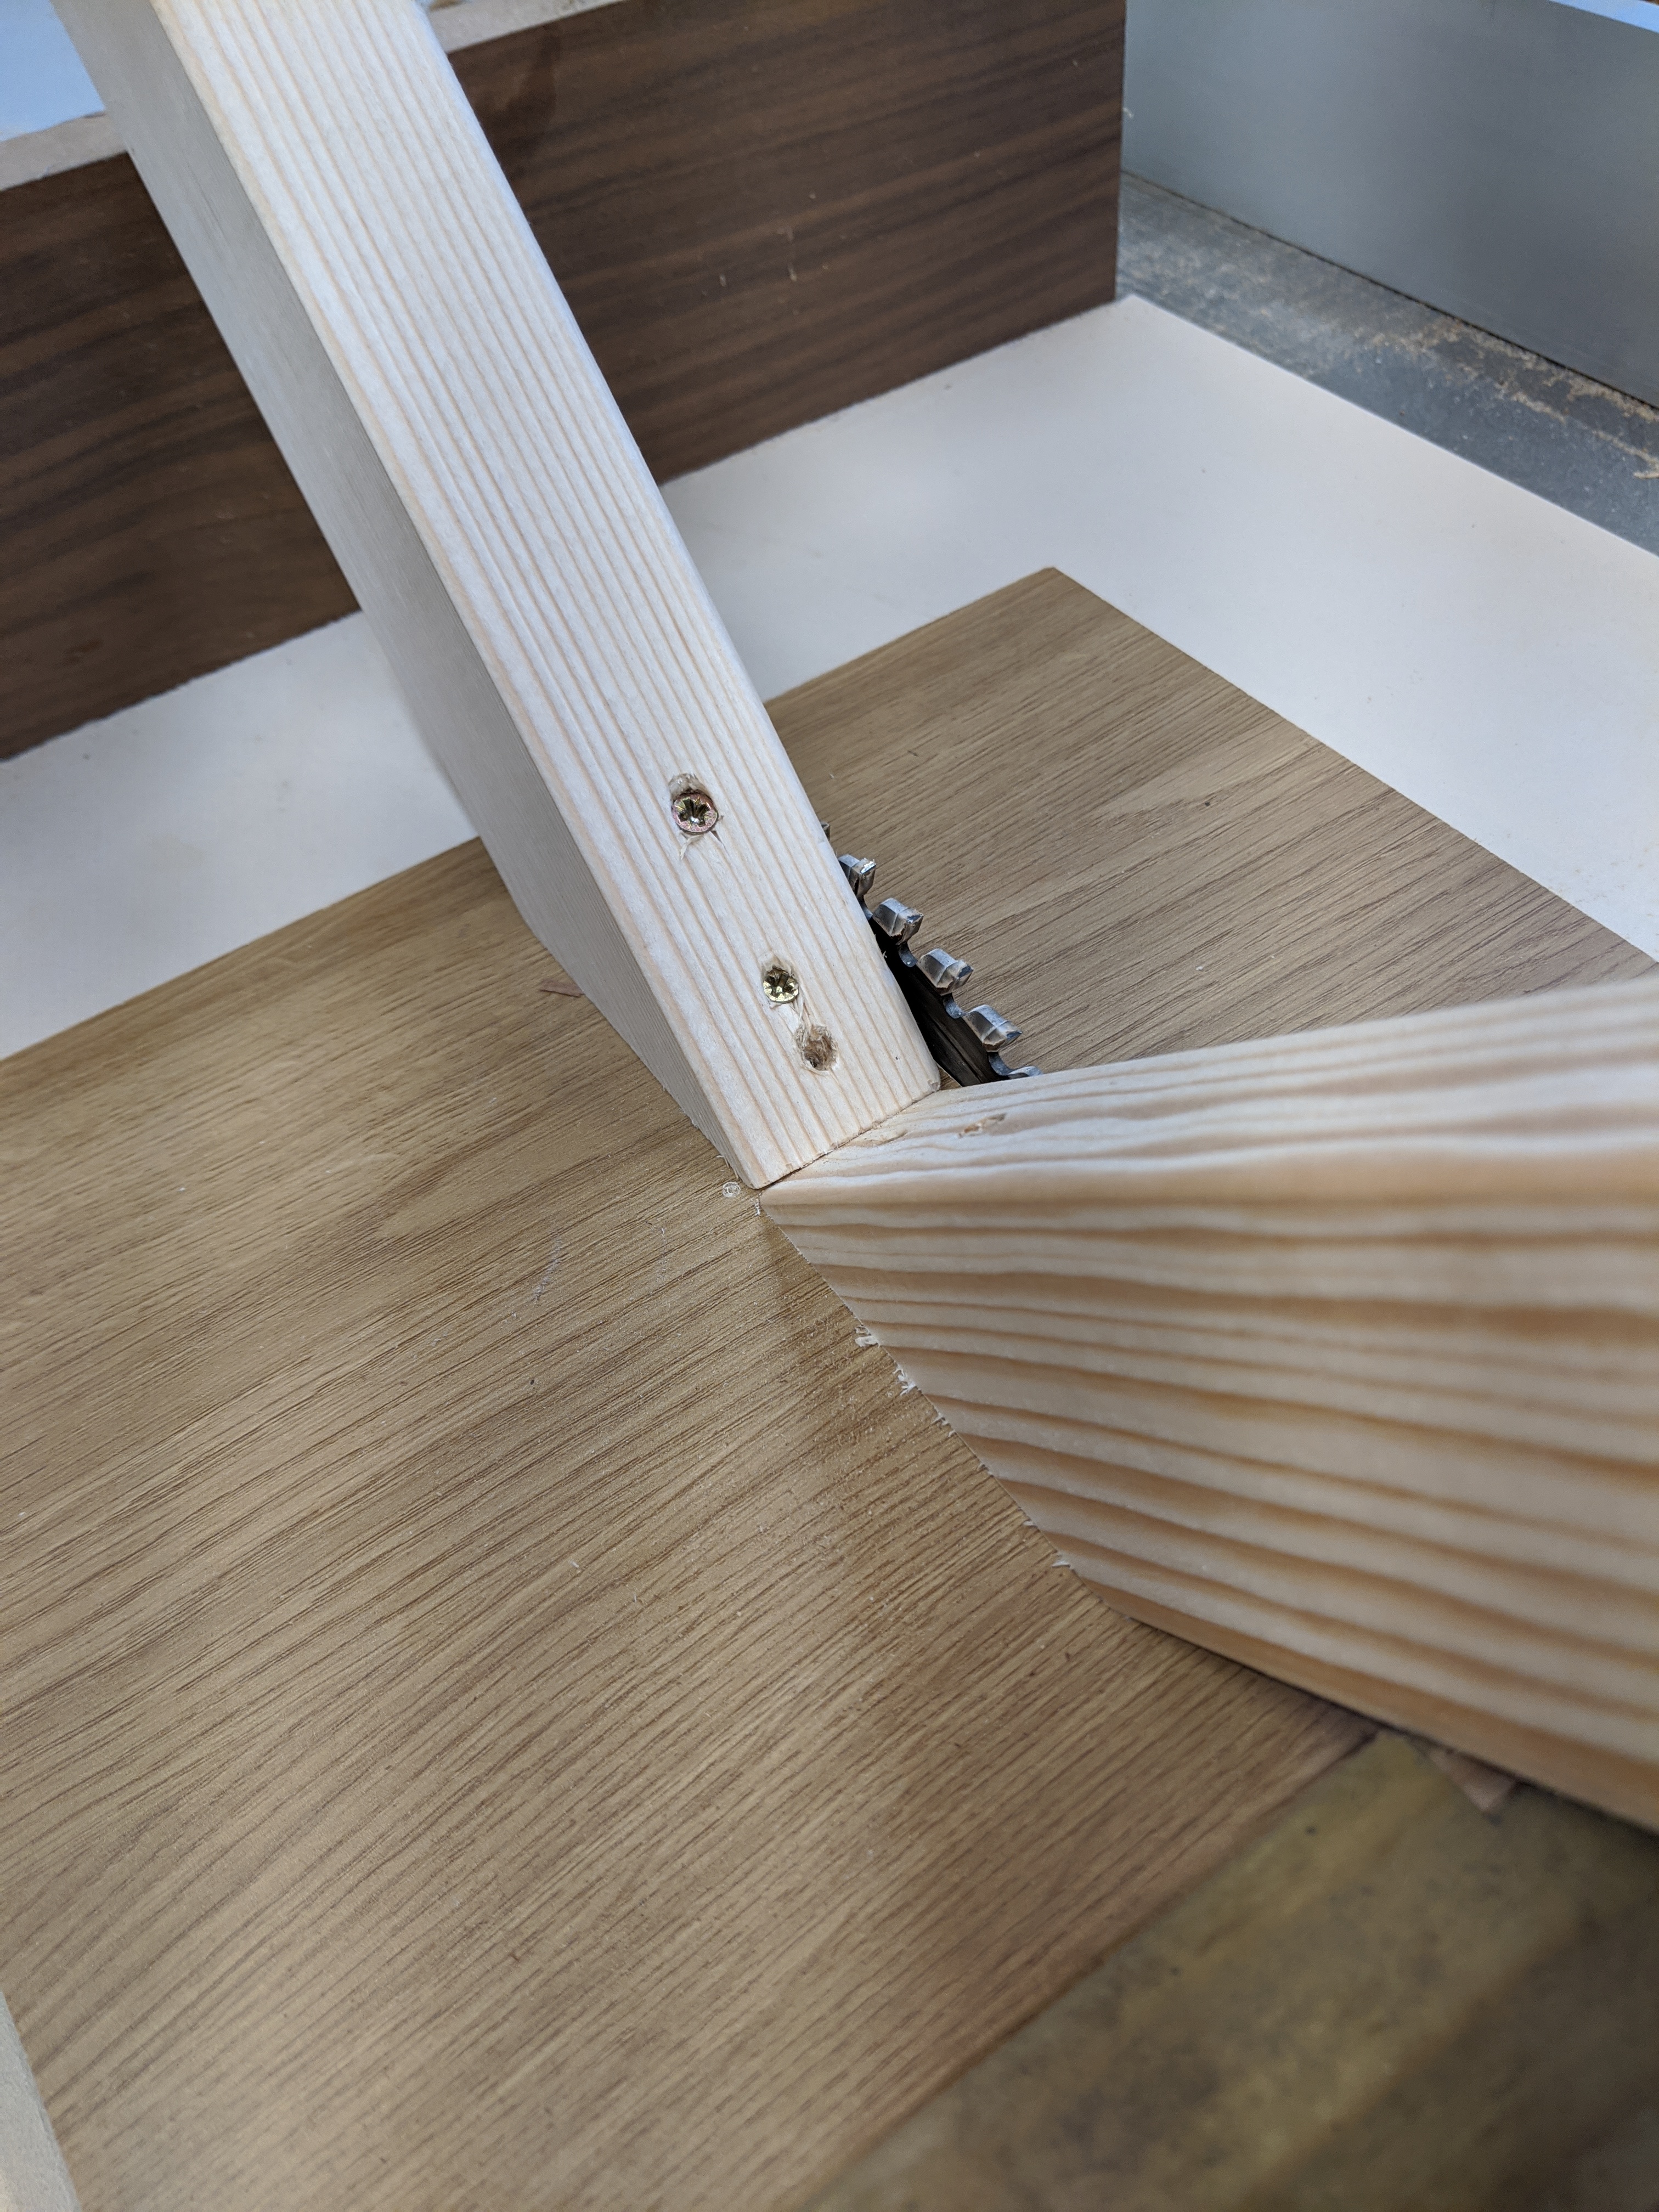
Creating a frame is the point at which you realise what you’ve created isn’t quite square. Fortunately the sign was close enough to square that the frame was pretty easy to create. Of course gluing end grain to end grain, for the mitred corners, never creates the strongest joint so I knocked up a quick jig to cut splines into each of the corners. The splines themselves I made from the paltry amount of wood I managed to save from a little cherry tree that fell down in our front garden. Once glued in the frame is pretty strong, certainly strong enough for this purpose.
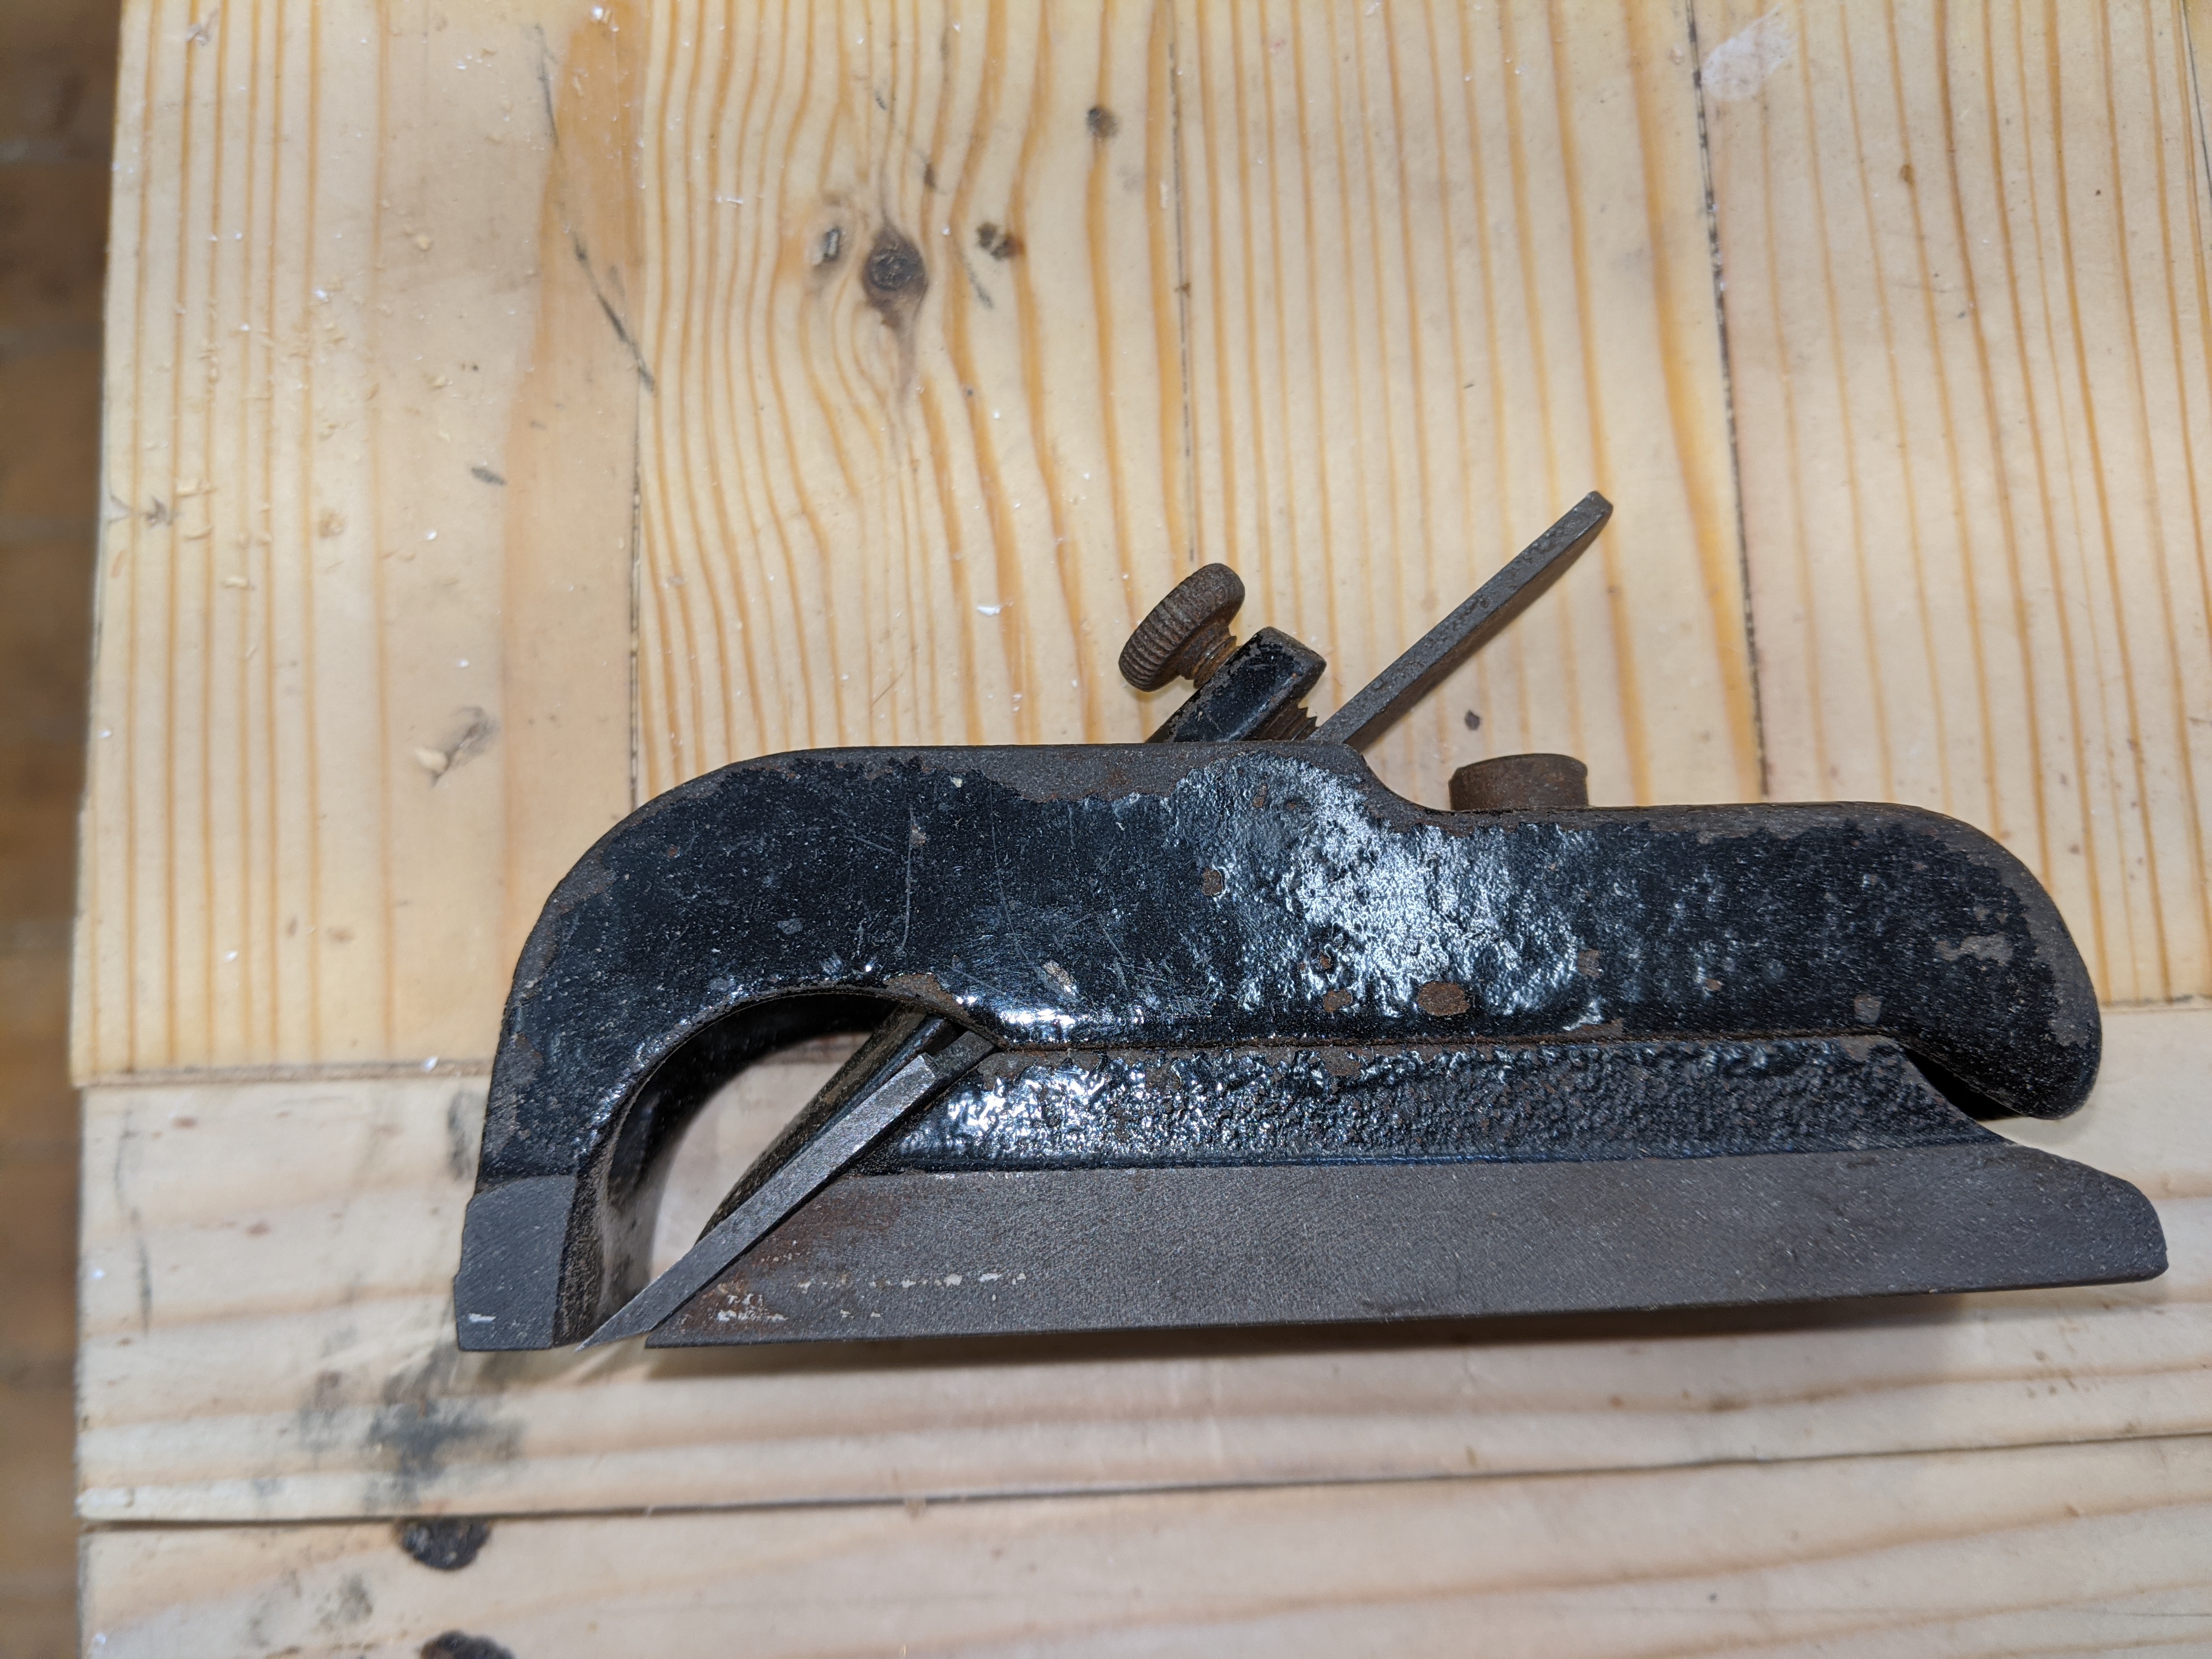
The shelf I’d glued in place to support the front of the sign needed some adjustment to allow the sign to sit flat in the frame. At this point I was very glad of the rebate plane dad had given me a few months previously and I’d semi-restored (i.e. cleaned and sharpened) - worked a treat. A bit of sanding, screws to hold the front and back to the frame (so it’s easy to take off if a bulb ever needs replacing) and the job is declared complete.
An hour or so at my parent’s place and the sign is up. It’s a few weeks late but, hey, quality takes time ![]()

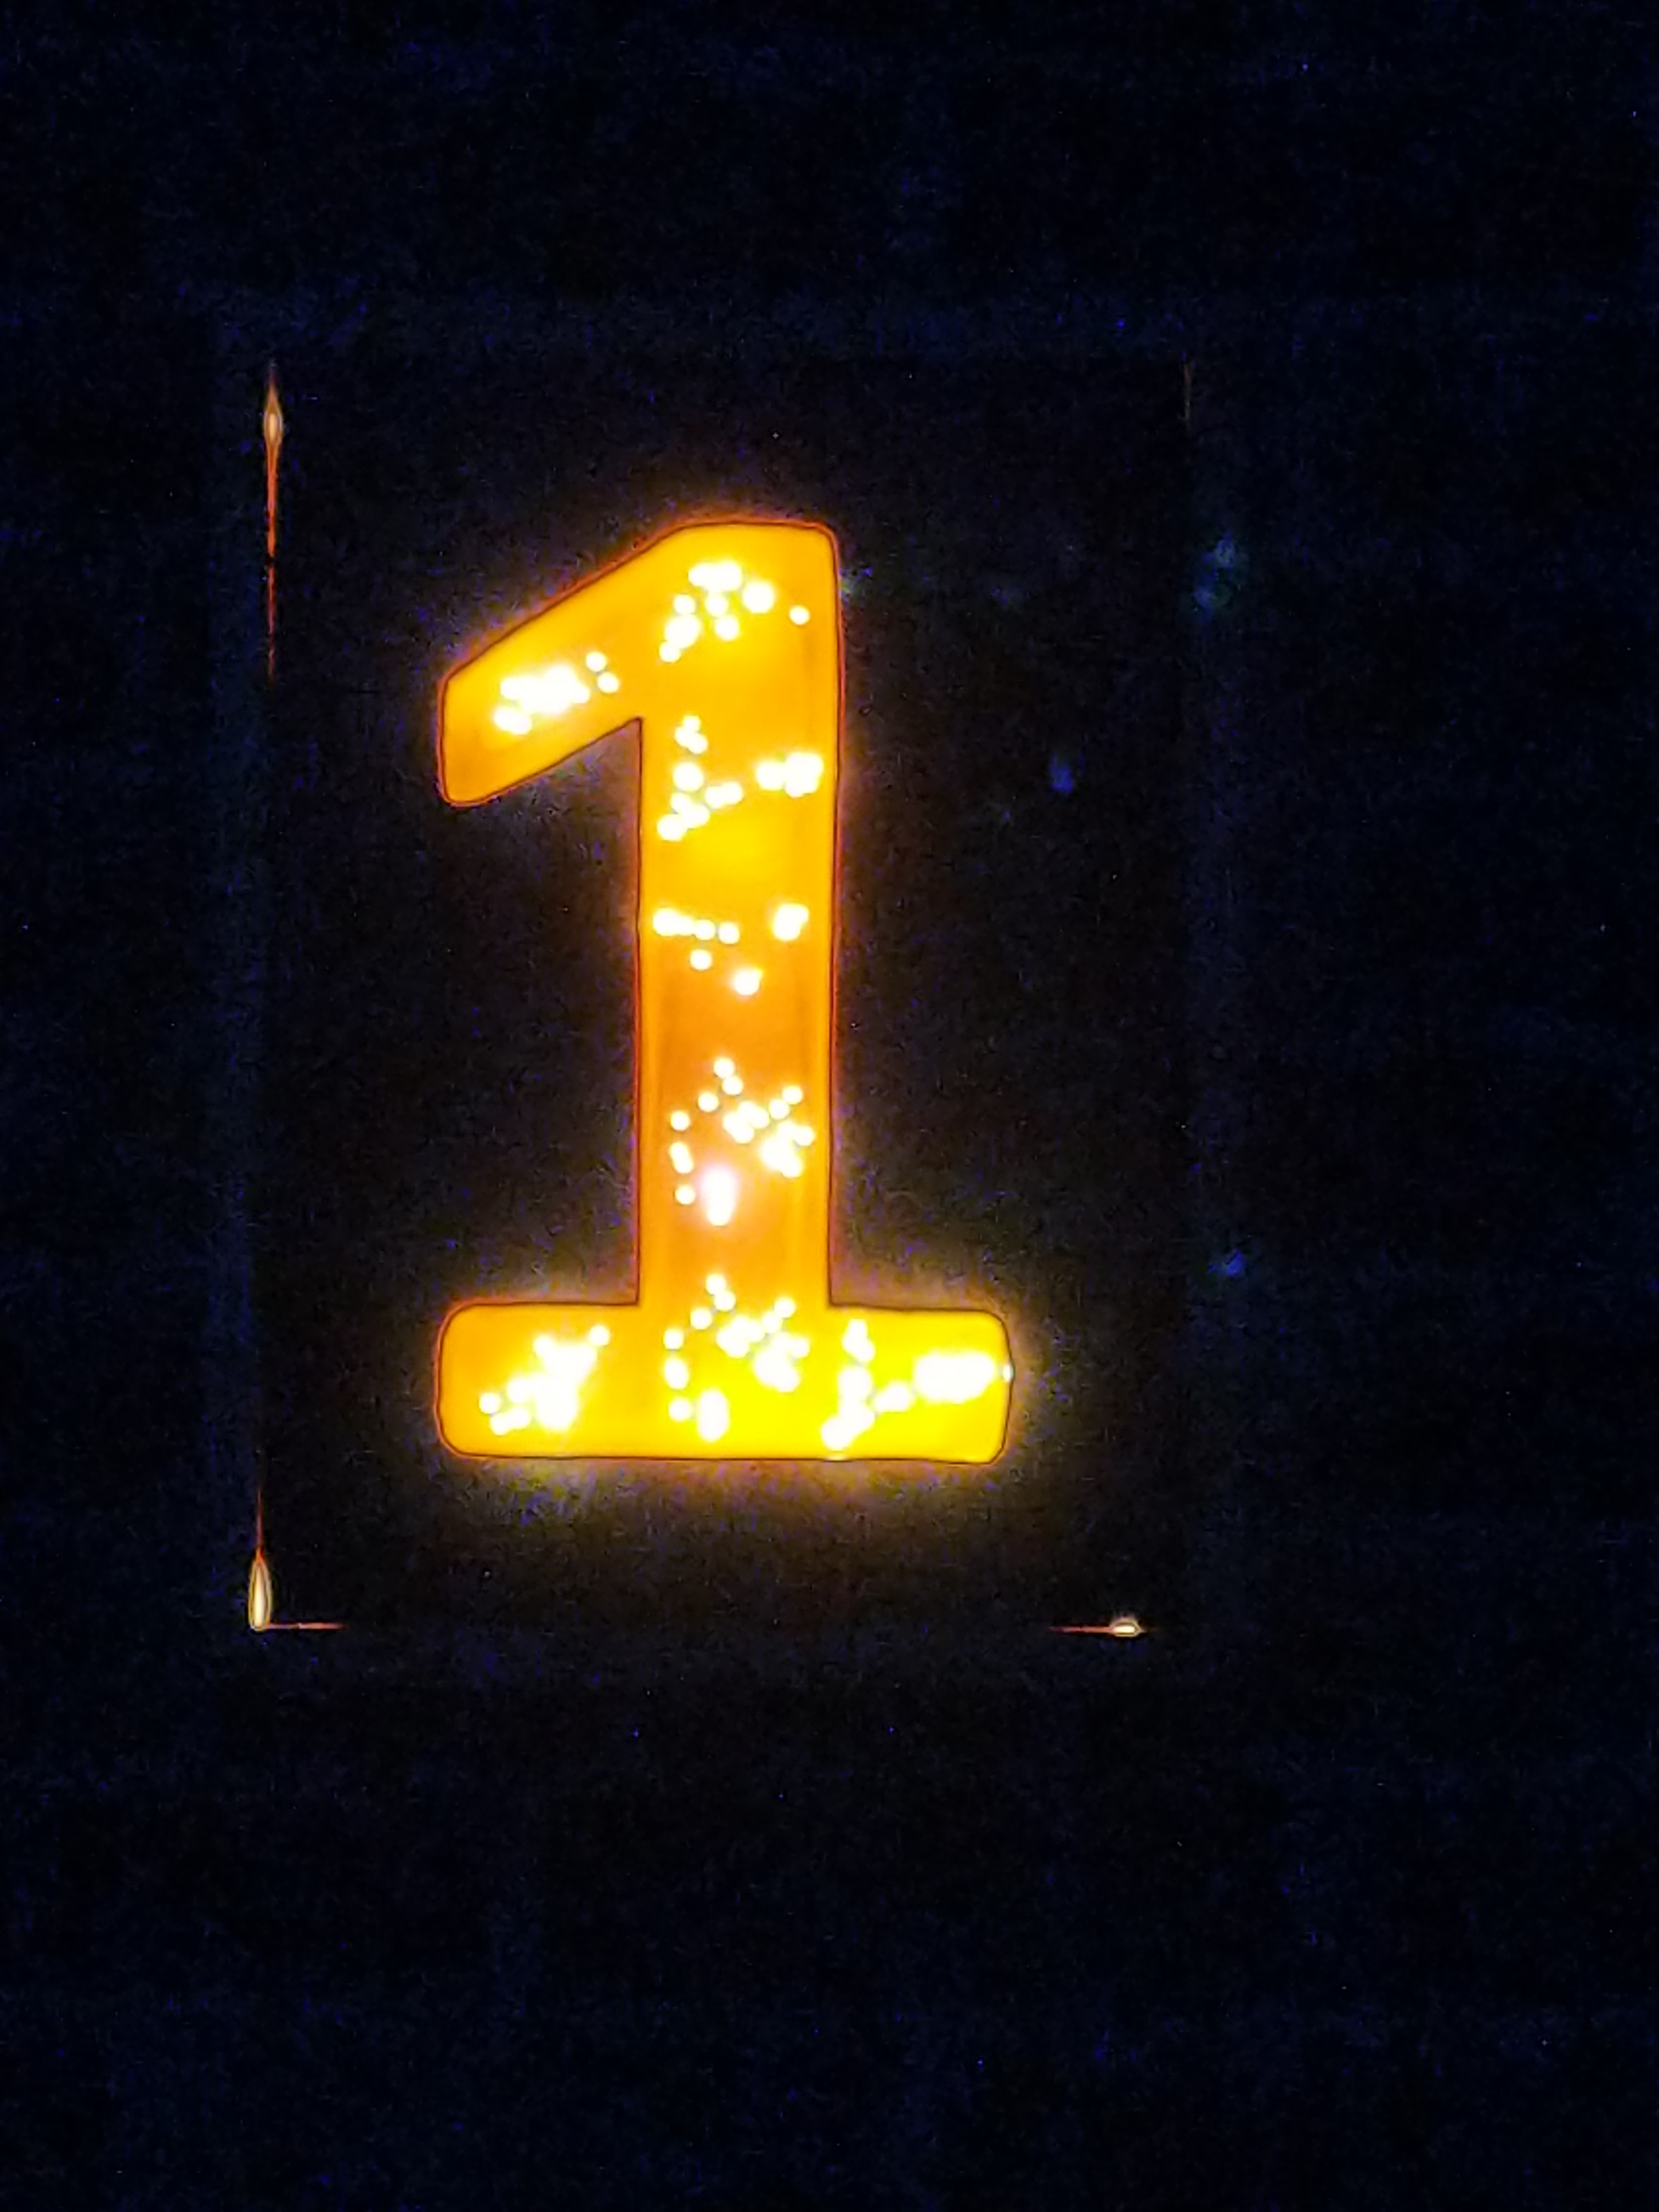
It gives off enough glow to see by but each star is clearly visible - the (mobile phone) photo doesn’t do it justice. Box ticked.